
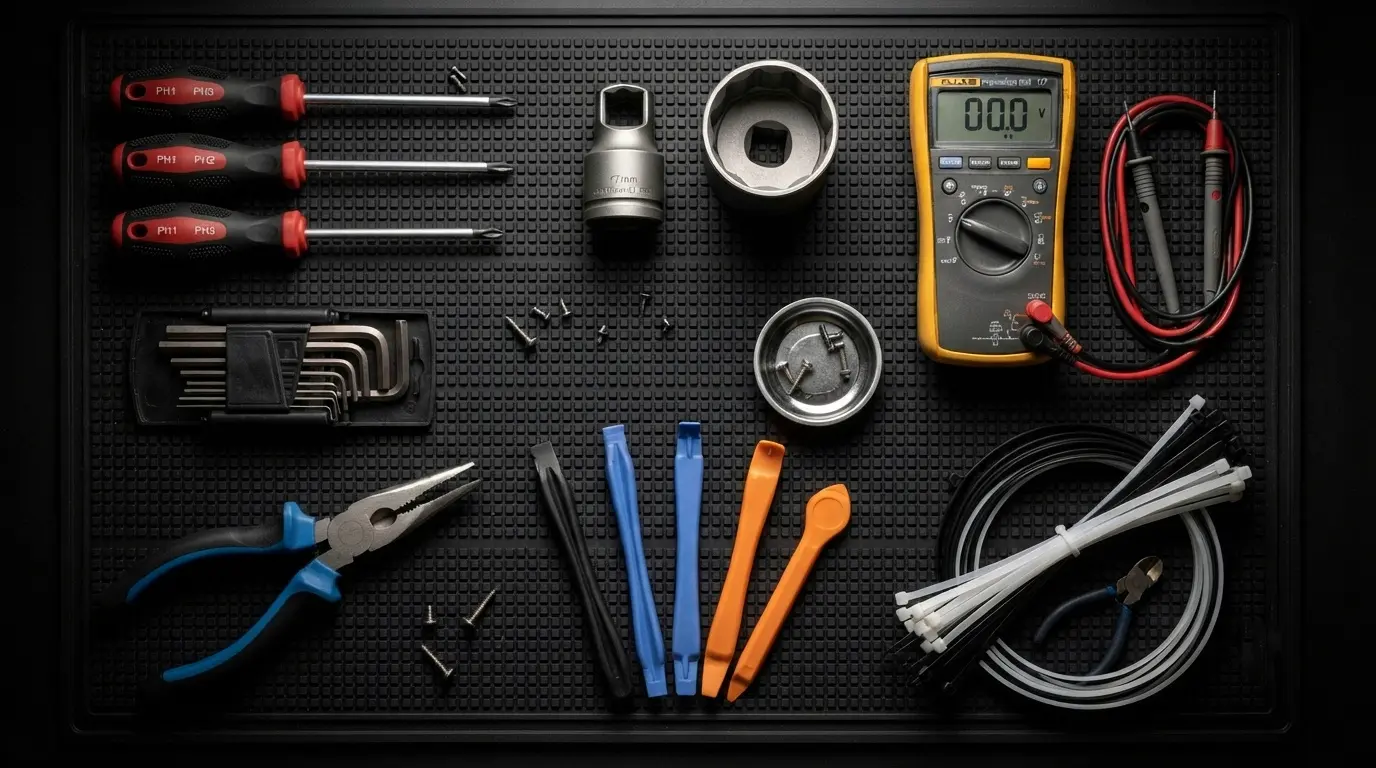
TechElectronicLive.com
This Guide Only For LG front-load washers, start with the checks. LG recommends to owners: clean the drain filter and inlet screens, level the washer, make sure the shipping bolts are out, and reduce the load. If the fault stays, four repairs cover the usual parts: the drain pump and inlet valve (moderate), and the Hall sensor and shock absorbers (advanced). Stop and call a technician whenever a step feels beyond your tools or confidence. Top-load models use different procedures, so the steps below do not apply to them.
Table of Contents
Who This Guide Is For
This guide is for owners who have narrowed a fault down to one part and want to replace it themselves. It covers four repairs, each with a difficulty label. The drain pump and the inlet valve are moderate jobs. They call for patience and careful photos more than special skill. The hall sensor and the shock absorbers are advanced jobs because they involve a heavy rotor with magnets or awkward access beneath the tub.
Every repair opens with the owner checks, since a blocked filter, a clogged screen, an uneven floor, or a forgotten shipping bolt causes more faults than a failed part. Do those first, and open the machine only if they change nothing.
Panel layouts and screw counts differ between models, so follow your manual wherever it disagrees with this guide. If you find damaged wiring, a seized drum, or anything you cannot identify, stop there.
Safety First
- Unplug the washer from the wall outlet. Pressing the power button is not enough.
- Turn off the water supply at the shutoff valves before touching any hose.
- Let the drum come to a complete stop and empty it of laundry.
- Put a shallow pan and towels under the work area. Hoses and the tub hold water even when the drum looks empty.
- Photograph every connector, hose, and clamp before you disconnect it.
- Wear gloves. The sheet-metal edges inside the cabinet are sharp.
- Never test a part with the power connected. Plug the washer in only after it is fully reassembled.
LG recommends that repairs be done by an authorized service center, so check your warranty before opening the machine.

- SNUG AND COMFORTABLE FIT: Nylon-Spandex material conforms to hand shape enabling detailed work while maintaining manual …
- TEAR AND ABRASION RESISTANT: Ideal everyday work gloves with tear and abrasion resistance, exceptional flexibility, and …
- SUPERIOR GRIP IN ALL CONDITIONS: Microfoam nitrile dip coating offers exceptional grip in dry, oily, and wet conditions
Match the Symptom to the Repair
| What you notice | Likely part | Difficulty | Check first. |
| Water stays in the drum, OE code. | Drain pump | Moderate | Drain hose and pump filter |
| Slow or no filling, IE code | Inlet valve | Moderate | Shutoff valves, hoses, inlet screens |
| LE code, drum jerks, or will not spin | Hall sensor (front-load direct drive) | Advanced | Load size, stuck objects, 5-minute disconnect |
| The machine walks, thumps, or shakes during spin. | Shock absorbers | Advanced | Shipping bolts, leveling, load size |
Repair 1: Drain Pump (Moderate)
Applies to: LG front-load washers.
Symptom: water stays in the drum after the cycle, the OE code appears, or the pump is silent or noisy during draining.
The owner checks first.
Look behind the washer for a bent or squashed drain hose. Then run a spin-only cycle and listen near the lower front. Hearing a low hum tells you the motor is still working, which makes a clogged filter the likelier culprit.
To clean the filter, open the small hatch at the bottom front and place a pan and towels underneath. Release the thin auxiliary hose, pull its plug, and let the remaining water run out. Unscrew the filter by rotating its cap counterclockwise. Scrub the filter and the opening behind it with a gentle brush and lukewarm water, then reinstall it firmly. Run the tub clean cycle afterward. Too much detergent can also trigger OE, because the foam is something the pump cannot move. If the code returns, the pump itself is the next suspect.
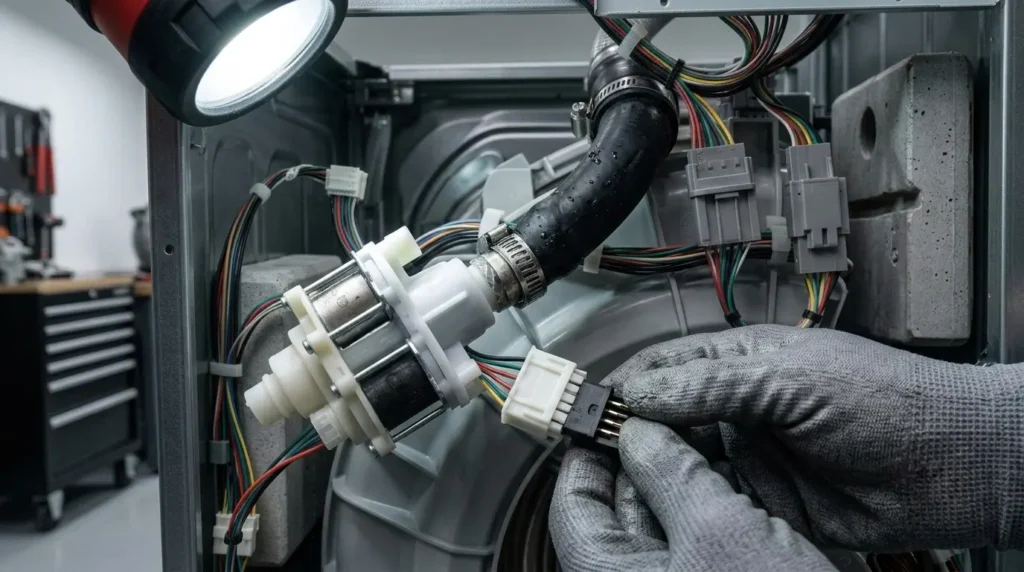
Tools and parts
Phillips screwdriver, flat-blade screwdriver, pliers, spring removal tool, pan and towels, phone camera, and a replacement drain pump are listed for your model.

- Washer spring disassembly tool of washing machine adopts all metal structure, with galvanized surface, anti rust and ant…
- Spring telescopic disassembly tools are widely used,Compatible with 4986er0004f / B / g boot, LG Electronics model WM053…
- Excellent structure and light design. The red handle adopts anti-skid design, which makes you more convenient and stable…
Steps
- Unplug the washer, shut off the water, and slide the machine out so you can work at the front. Drain any leftover water first.
- Remove the two screws holding the top panel. Slide the panel back slightly and lift it off.
- Pull out the detergent drawer (a release tab inside holds it), remove the control panel screws, free the clips, and unplug the panel’s harness. Rest the panel on top of the machine.
- Use the spring removal tool to expand the retaining ring around the door boot. Lift the ring off and tuck the boot into the drum.
- Disconnect the door lock connector (on some models you remove the latch assembly instead). Remove the front panel screws, whose number and position vary by model, then lift the panel away. Expected: the pump sits low at the front with two hoses and its wiring.
- Photograph the hoses and wiring. Slide back each hose clamp, pull the hoses off and let the trapped water drain into the pan.
- Unplug the pump’s connectors. Needle-nose pliers help if they are stiff, but rock them gently.
- Take out the two pump screws. A small tab on the frame behind the pump keeps it locked in place, so push that tab down and the pump will slide free.
- Seat the new pump so it clicks into its track, reinstall the two screws, reattach the hoses and clamps, and plug in the connectors. Rebuild the panels in reverse, seating the boot ring starting at the top.
Check the result: run a drain or spin cycle. Water should leave the drum, and nothing should drip at the clamps.
If it did not work, confirm the connectors clicked home and both hoses sit fully on their fittings. If water still stays after that, call a technician.
Repair 2: Water Inlet Valve (Moderate)
Applies to: LG front-load washers.
Symptom: slow filling, no water, the IE code, or water seeping from the valve area.
The owner checks first.
Make sure each shutoff valve is turned all the way on. Look along both supply hoses for bends or damage, and consider ice in the lines if the weather is freezing. Then turn off the shutoff valves, unscrew the hoses from the back of the washer, and pull out the small filter screens at the connections. Hold each screen under a faucet and scrub away the debris with a soft toothbrush, then reinstall the screens and test the fill again. Clogged screens are a common reason for a slow fill, and they cost nothing to fix. If a clean supply still gives an IE code, move on to the valve.
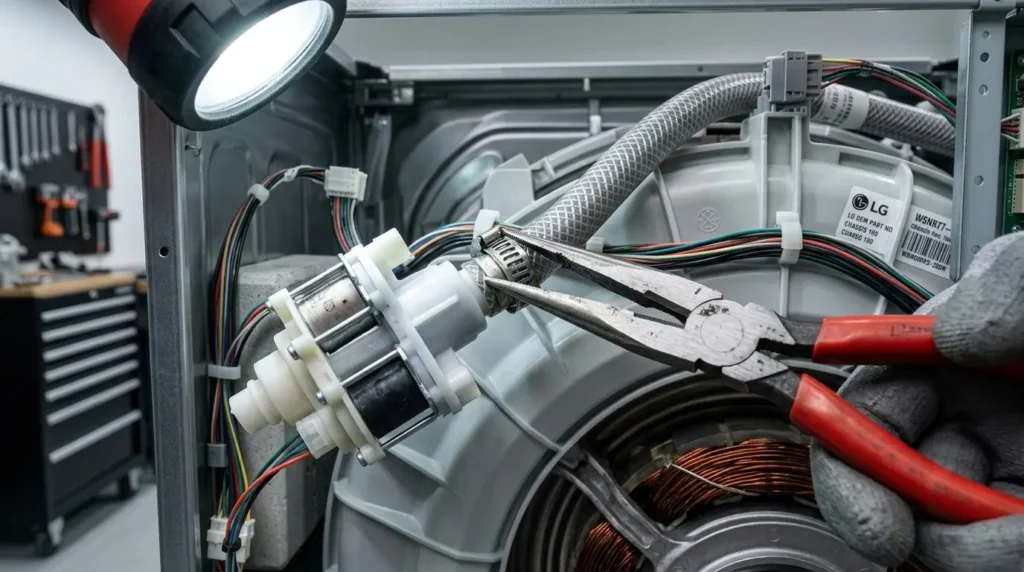
Tools and parts
Phillips screwdriver, pliers or channel-lock pliers, towels, a phone camera, and a replacement inlet valve are listed for your model.

- The Hose Clamp Pliers helps you remove and install flat-type or ring-type hose clamps easily with the max opening of 1.3…
- The max opening of the hose clip pliers is 1.38inch(35mm) with a total length 215mm.
- Made of high quality heavy duty carbon steel, sturdy and lasting.
Steps
- Unplug the washer, close the shutoff valves, and slide the machine out so the back is within reach. Put towels behind it.
- Disconnect the supply hoses from the valve inlet ports. Expect a little water to run out.
- Remove the two screws holding the top cover, slide it back, and lift it off. Expected: the valve is visible at the upper rear, with hoses and connectors attached.
- Photograph each hose and connector on the valve.
- Slide back the clamps or retainer rings on the internal hoses with the pliers and pull the hoses off. Keep a towel under them.
- Unplug the electrical connectors, pressing their locking tabs as you pull.
- Remove the two mounting screws at the back panel near the inlet ports, then lift the valve out.
- Install the new valve with the same two screws. Press each hose back on and seat its clamp in the original groove. Reconnect the electrical plugs using your photos.
- Reinstall the top cover and the supply hoses, then open the shutoff valves. Watch every joint for a couple of minutes before you start a wash.
Check the result: the drum should fill at a normal pace, and no joint should seep.
If it did not work, recheck that each clamp is fully seated and each connector is pushed home. If the washer still does not fill, call a technician.
Repair 3: Hall Sensor (Advanced)
Applies to: LG front-load direct drive washers only.
Symptom: the LE code, with the drum jerking or refusing to spin.
The owner checks first.
The LE code means the drum could not turn. Remove part of the load, and use the bedding cycle for heavy items. Check the drum gaps for a coin or small clothing item. Then disconnect the washer for 5 minutes and run a short spin with a light load. If LE returns, the Hall sensor is a likely cause, but a failed stator or control board can also produce it.
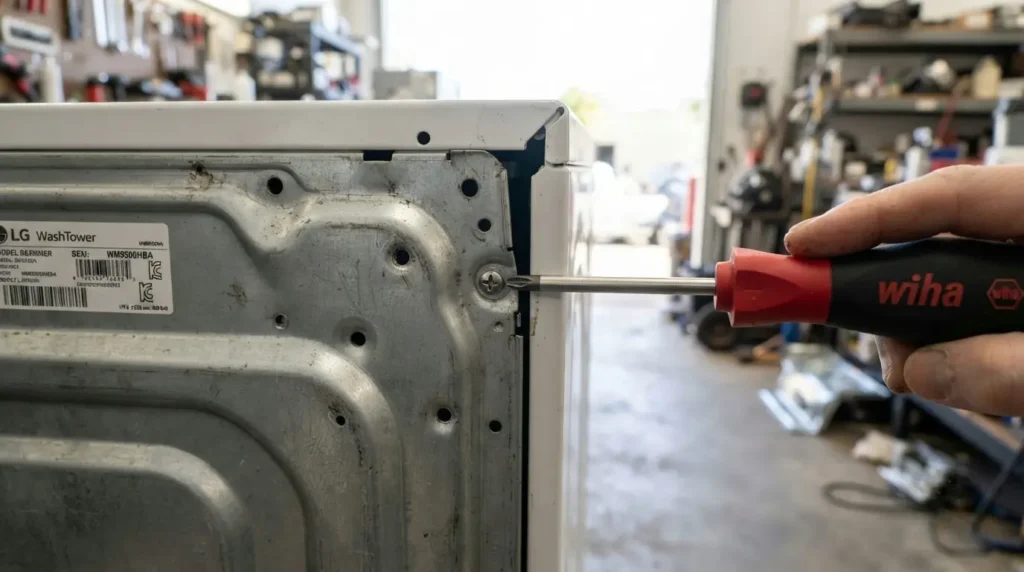
Tools and parts
Phillips screwdriver, flat-blade screwdriver, 17 mm and 10 mm sockets with a ratchet, towels, a phone camera, and a replacement Hall sensor. Two versions exist, so compare the old sensor with the new before you install it. A multimeter is optional.

- HIGH DURABILITY: The impact socket set 1/2 drive metric and standard is made of high impact grade components of this mas…
- 6 POINT DESIGN: The 6-Point hex 1/2 impact socket set design prevents round-off on nuts and bolts under high torque exer…
- DUAL MARKINGS: The impact socket set 1/2 drive has a highly visible laser-etched markings on the black phosphate finish …
Steps
- Unplug the washer and pull it out so you can reach the back.
- Remove the four rear panel screws and take the panel off.
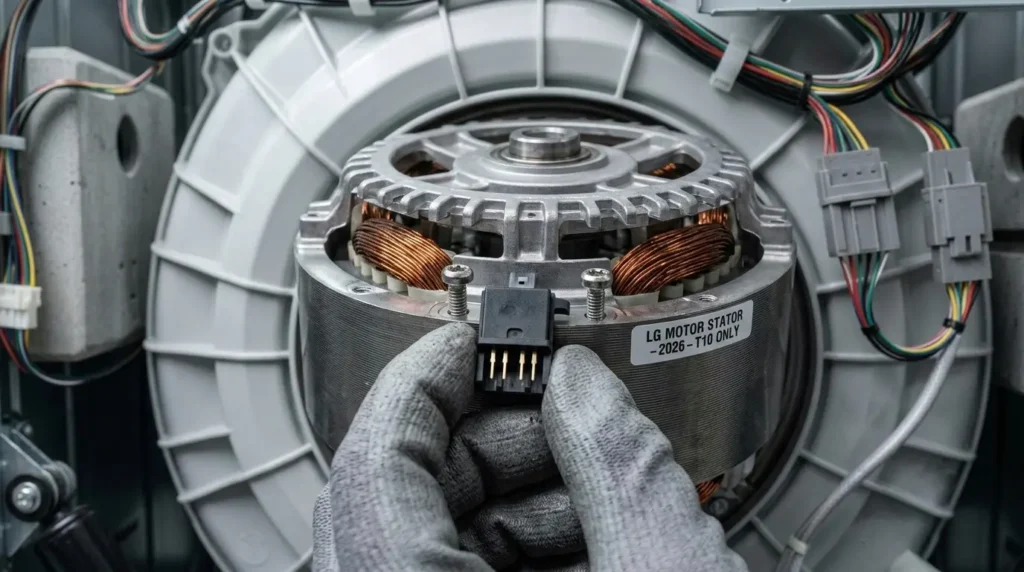
- Remove the rotor’s 17 mm center bolt. The rotor is the ring-shaped outer part of the motor, and it carries magnets, so keep your fingers clear. If it turns with the bolt, check your manual for the recommended way to hold it.
- Rock the rotor gently from side to side while pulling it straight toward you until it comes free. Expected: the stator is exposed, with the sensor on its back.
- Remove the stator bolts with the 10 mm socket and unplug the connectors. On some models you can pull the stator back far enough to reach the sensor, and on others it must come off completely. Follow your manual, and support the stator as the last bolt comes out.
- Note which way the sensor sits. Ease its tabs back with a flat-blade screwdriver or your fingertips and lift it out.
- Optional test, with everything unplugged: check the old sensor’s resistance across its pins and compare the reading with the value in your service manual. A reading far from that value, or none at all, points to a failed sensor.
- Press the new sensor into the same position until it clicks, then give it a gentle wiggle to check that it is firm.
- Rebuild in reverse: stator bolts, connectors, rotor, center bolt, rear panel. Tighten fasteners to the specification in your manual.

- ADVANCED AND VERSATILE—accurately measures 1000A AC/DC current, 1000V DC/750V AC voltage, capacitance, frequency, duty c…
- Surge current meter—understanding the value of surge current helps you quickly identify startup issues, whether with mot…
- Variable Frequency Drive (VFD) and Low Impedance Mode – Enables high-precision current and voltage measurements on varia…
Check the result: run a short spin with a light load, or use your manual’s test mode if it lists one. The drum should turn smoothly with no LE code.
If it did not work: recheck that the sensor and connectors are fully seated. If LE returns, the stator or control board needs a technician.
Repair 4: Shock Absorbers (Advanced)
Applies to: LG front-load washers.
Symptom: the machine walks across the floor, thumps loudly in spin, or cannot balance a load.
Owner checks first
If the washer is new or was moved recently, confirm the shipping bolts at the back are out. To check, grip the front rim of the drum and try to rock it. A drum that stays rigid means the bolts are still in place. Remove them with a wrench and store them for future moves. Next, check the machine is level across its width and its depth, with all four feet firmly on the floor. Back off a front foot’s locknut before adjusting its height, and clear away any wood or pan under the machine. Smaller loads and rubber cups under the feet on tile can also help. If the drum still wobbles heavily after all this, move on.
Tools and parts
Gloves, a box-end wrench or deep socket to press the pin tabs, a hammer or mallet for gentle taps, pliers, screwdrivers, a spring removal tool if the front panel has to come off, and a set of replacement absorbers listed for your model. The machine has three.
Steps
- Unplug the washer and slide it out. Wear gloves throughout.
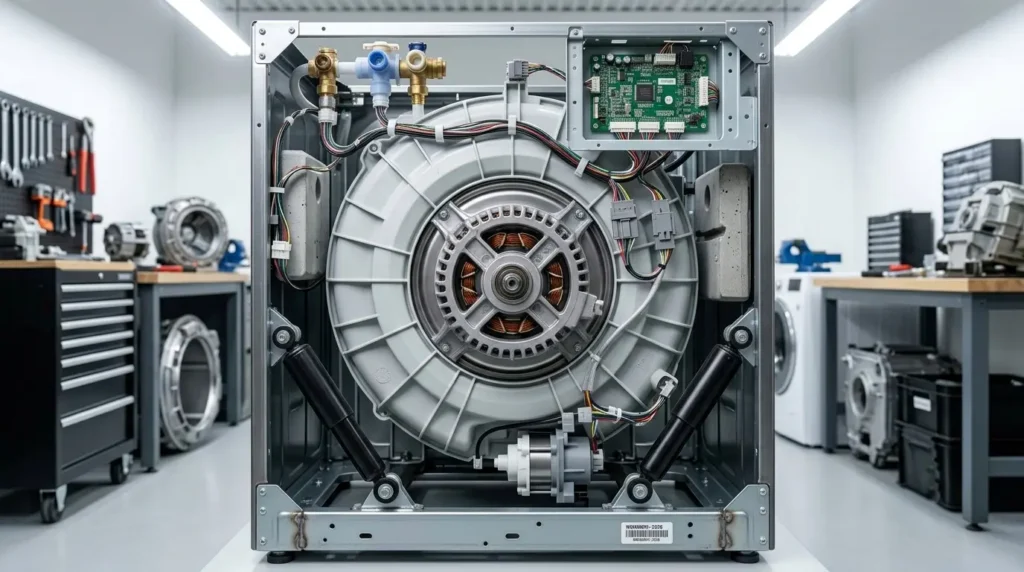
- Reach the absorbers. On some models the rear panel gives access, and on others the top panel, drawer, control panel, door boot ring and front panel must come off first (the same sequence as Repair 1). Follow your manual. Expected: three absorbers link the lower tub to the base frame.
- Press the tabs on one pin, using the wrench or socket, and tap the pin out of the mount. Remove the pin at the other end and lift the absorber out.
- Install the new absorber the way the old one sat, and push the pins in at both ends.
- Tap each pin gently until it is fully seated and its tabs have popped out on the far side. A half-seated pin lets the absorber move.
- Repeat for the other two absorbers.
- Reassemble in reverse. If the boot ring came off, seat the boot in its lip first, then work the ring around starting at the top.
- Recheck that hoses and harnesses are routed as photographed.
Check the result: run a light load through spin and listen. The drum should stay steady, and the machine should not creep or thump.
If it did not work: recheck the pins and the leveling. Broken springs, worn bearings or a drum that sags need a technician.
When to Call a Technician
Call one if:
- The fault remains after the owner checks and the matching repair.
- The drum is seized or the bearings feel loose.
- Wiring looks damaged or burned.
- A step needs testing with power on.
Motors, stators, control boards and bearings are professional work, and so is any repair on a washer still under warranty. LG advises that repairs be carried out by an authorized service center.
Prevention Tips
- Run the tub clean cycle monthly.
- Clean the drain pump filter regularly.
- Clean the inlet screens now and then, especially if your water carries sediment.
- Use only the recommended amount of detergent, since too much foam can trigger OE.
- Keep the washer level, with all four feet touching the floor.
- Avoid overloading the drum, and check pockets for coins before every wash.
Related Errors and Common Problems
- OE: the washer cannot drain. See Repair 1.
- IE: the washer cannot fill. See Repair 2.
- LE: the drum could not turn. See Repair 3.
- UE: an unbalanced load or an unlevel washer. Check the leveling in Repair 4 first.
- dE: a door problem. Check that the door closes properly and the lock connector is seated. LG dE error code Guide
- tCL: a reminder to run the tub clean cycle.
FAQs
Can I repair my LG washing machine myself?
Yes, for the owner checks, and many owners manage the drain pump and inlet valve with basic tools, patience and photos. The Hall sensor and shock absorbers are advanced because of the heavy rotor and awkward access. LG recommends authorized service for repairs, so check your warranty first. Start with the filter, screens, leveling and shipping bolts, and stop whenever a step feels beyond you.
Why won’t my LG washer drain?
A bent drain hose or a clogged pump filter is the usual cause, and both are free to check. Run a spin-only cycle and listen for a hum, which means the pump motor works. Then clean the filter and its opening and run the tub clean cycle. Excess foam can trigger OE too. If the code returns, the pump may need replacing, or a technician should inspect it.
Why is my LG washer not filling with water?
Check that the shutoff valves are fully open, the hoses are not bent and ice is not blocking the lines. Then remove the supply hoses and clean the screens at the connections under running water. Only when a clean supply still gives a slow fill or an IE code does the inlet valve become the likely cause. If a new valve changes nothing, call a technician.
Why does my LG washer shake or thump during spin?
Remove the shipping bolts if the machine is new or recently moved, check that it is level with all four feet on the floor, and avoid oversized loads. Those fixes cover most shaking. If the drum still wobbles heavily, worn shock absorbers become likely, though a drum that wobbles excessively may also need a technician. The usual approach is to replace all three absorbers.
How do I know which part failed before I buy?
Match the symptom to the owner checks first: filter and hose for draining, shutoff valves and screens for filling, leveling and shipping bolts for shaking. An LE code on a front-load direct drive washer points toward the Hall sensor, but overload or a stuck object can cause it, and so can a failed stator or control board. Buy by model number and compare the old part with the new, since Hall sensors come in two versions.
When should I call a technician instead?
Call one when the owner checks and a replacement have not cleared the fault, when the drum is seized or the bearings feel loose, when wiring looks damaged, or when a repair needs power-on testing. Call before opening the machine if it is under warranty, since LG recommends authorized service. Control boards, motors, stators and bearings belong to a professional.
Bottom Line
Four repairs cover the common LG washer faults here. The drain pump and the inlet valve are moderate jobs. The Hall sensor and the shock absorbers are advanced jobs, because they involve a heavy rotor and awkward access.
Always begin with the owner checks. Clean the drain filter and the inlet screens, level the washer, remove the shipping bolts and lighten the load. These fix many problems without opening the machine. If the fault stays, tackle the drain pump or inlet valve first, then the Hall sensor, and leave the shock absorbers until leveling and shipping bolts are ruled out.
Call a technician when the fault survives a repair, when you meet a seized drum or damaged wiring, or when your warranty applies. Your next step is to match your symptom to the table above and run its owner checks today, before you pick up a screwdriver.