
Most people assume coil cleaning means dragging the fridge away from the wall and unscrewing the back, and that assumption alone is why half the LG refrigerator condenser coils I inspect on service calls have never been touched since installation.
Table of Contents
Why This Method Works on Most LG Models
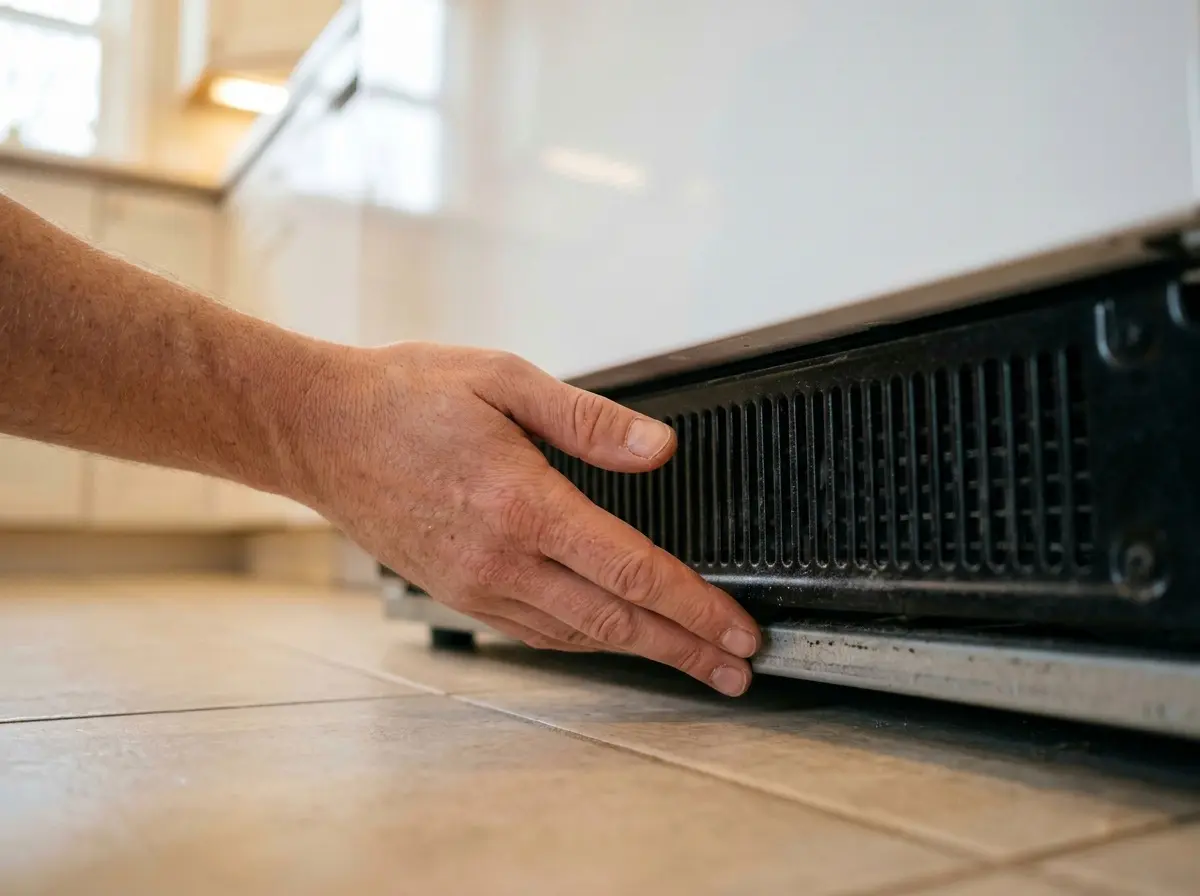
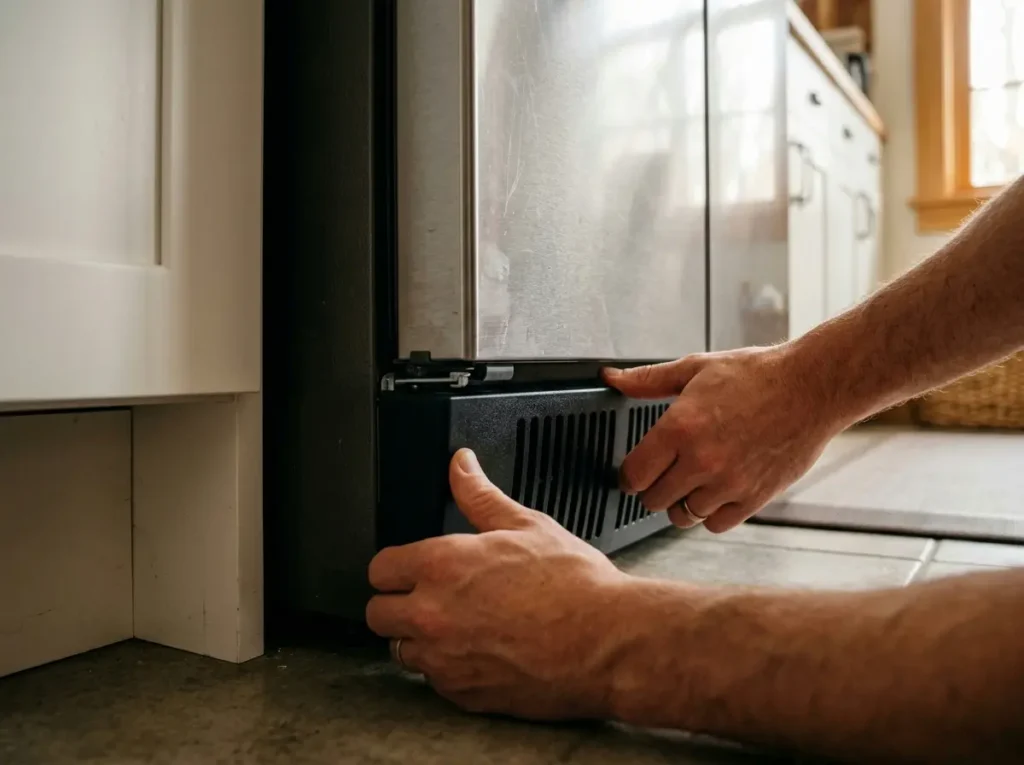
Here’s something most cleaning guides skip entirely: not every LG refrigerator has its condenser coils on the back panel at all. On a large share of LG’s bottom-freezer and French-door models, the coils sit low at the front, behind a removable kick-plate grille just above the floor, the same spot the compressor and condenser fan live. That’s a deliberate design choice, not a shortcut LG built in by accident, and it’s exactly why front-access cleaning is a legitimate full method on these units, not a compromise.
On older LG models and some smaller top-freezer units, coils are genuinely mounted on the rear of the cabinet, and front-access cleaning won’t reach them; no amount of technique substitutes for coils that physically aren’t there. Knowing which layout your fridge has before you start saves you from spending twenty minutes vacuuming a grille that has nothing but the fan behind it.
What technicians actually check first: before pulling out any tool, I run a finger along the bottom edge of the kick-plate grille. If it’s warm to the touch and there’s a faint hum of airflow, that’s the coil compartment, confirming you’re in the right spot before committing to the full cleaning process below.
Tools and Products You’ll Actually Need
You don’t need specialty cleaning products for this job; in fact, most of what’s marketed as “refrigerator coil cleaner” is unnecessary for a routine cleaning.
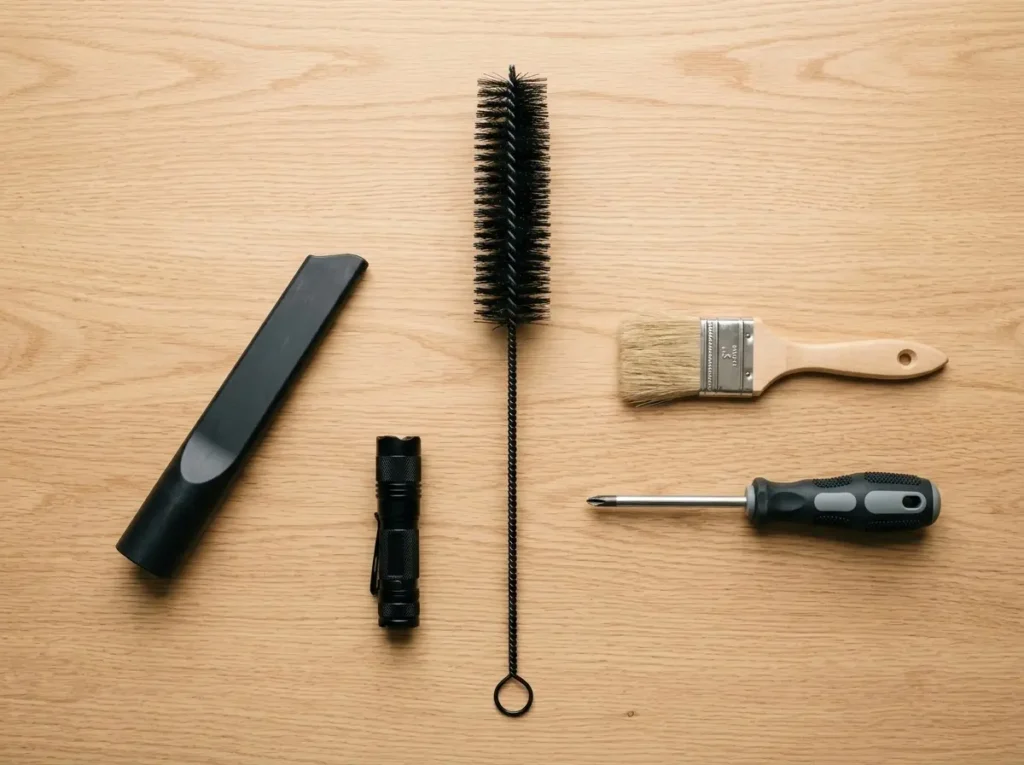
- A coil cleaning brush with a narrow, flexible head, the kind sold specifically for refrigerator or dryer vent coils, roughly 18–24 inches long, works best for reaching between fins without bending them.
- A vacuum with a narrow crevice attachment, ideally one with adjustable suction so you’re not fighting to control airflow near delicate fins.
- A flashlight or phone light; the coil compartment is dim even with the kick plate removed, and visually confirming buildup before and after matters more than people expect.
- A soft-bristle paintbrush (1–2 inch width) as a backup for loosening compacted dust the vacuum brush can’t dislodge on its own.
- A screwdriver matching your model’s kick-plate fasteners; some LG units use simple snap-fit grilles, others use one or two Phillips screws.
Skip canned compressed air as your primary tool here. It’s fine as a finishing pass, but used alone, it tends to just relocate dust deeper into the compartment rather than removing it. I’ve opened compartments “cleaned” with compressed air only to find the dust simply repacked against the back wall.
Locating the Front-Access Coil Panel on Your LG Fridge
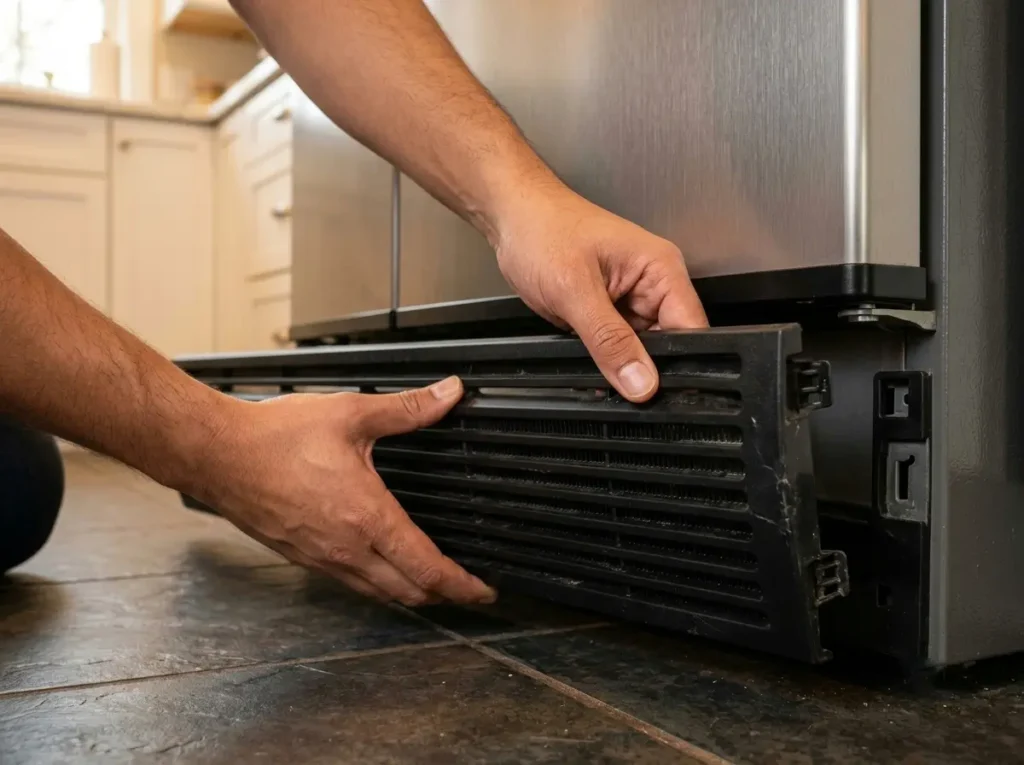
On most LG bottom-freezer and French-door refrigerators, the kick-plate grille runs the width of the unit along the very bottom front edge, just below the doors. It’s typically held in place by two side clips or a pair of screws near the top edge of the grille, pressing in and pulling down; removing the visible screws usually releases it without tools beyond a screwdriver.
Model-specific detail worth knowing: on LG’s larger French-door models (the LFXS-series and similar), the grille tends to be a single wide piece spanning almost the full cabinet width, while smaller bottom-freezer models sometimes split it into two narrower sections. Neither design changes the cleaning process, but knowing which one you’re working with helps you avoid forcing a grille that’s actually two separate pieces.
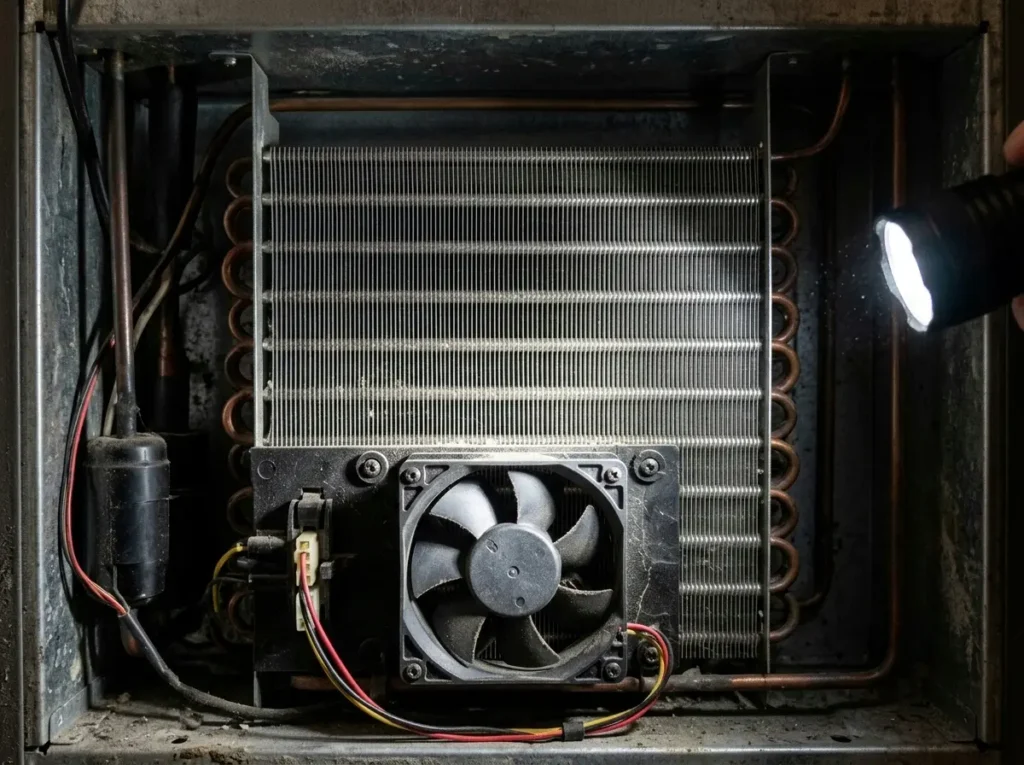
Once removed, you’re looking at a compartment containing the condenser fan (a small plastic-bladed fan, usually toward the center or one side) and the coil assembly itself, a finned metal grid that may be arranged vertically, horizontally, or in an L-shaped configuration depending on the model. Don’t force any wiring or fan housing aside; everything you need to clean is accessible without disconnecting anything.
Step-by-Step: Cleaning the LG Refrigerator Condenser Coils Without Moving the Unit
- Unplug the refrigerator, or at minimum switch it off at a wall switch if it’s on one; the condenser fan can activate during this process, and you don’t want it running while your brush is inside the compartment.
- Remove the kick-plate grille using the clip or screw method appropriate to your model, and set it aside somewhere it won’t get stepped on.
- Shine your light into the compartment and take a look before touching anything; note where the dust is heaviest (usually the intake side facing the room) versus lighter buildup deeper in.
- Vacuum the loose surface dust first, using the crevice attachment along the visible face of the coils. This clears the bulk of it before you start dislodging the more compacted layer underneath.
- Work the coil brush between the fins, moving it in the same direction as the fin spacing rather than across it, pushing across the grain of the fins is what bends them, and bent fins reduce airflow permanently even after cleaning.
- Vacuum again immediately after brushing each section, since the brush will loosen dust that the first pass didn’t reach, and leaving it sitting in the compartment just means it resettles.
- Check the condenser fan blades while you’re in there; a light dusting with the soft paintbrush is fine, but avoid pushing the vacuum directly against the blades, which can bend lightweight plastic fan blades over time.
- Reinstall the kick-plate grille, making sure clips fully seat or screws are snug; a loose grille can rattle and, on some models, slightly affect airflow into the compartment.
- Plug the unit back in and give it a few minutes before checking that the compressor and fan sound normal.
The whole process typically runs 15–25 minutes once you’ve done it once and know your model’s grille type.
👉 LG Refrigerator Not Cooling Properly: What to Check First
How to Tell If You’ve Actually Gotten the Coils Clean
Visual confirmation matters more here than in almost any other cleaning task, because coils that look “mostly clean” from a quick glance often still have a compacted gray layer between the fins that a light vacuum pass won’t touch.
Shine your light across the coil face at a low angle rather than straight-on; buildup that’s invisible head-on often casts a visible shadow line at an angle, especially compacted lint that’s flattened against the fins rather than sitting loosely on the surface. If you can see individual fin gaps as distinct dark lines with light passing between them, you’ve done a thorough job. If the fins look like a solid gray sheet rather than a grid, there’s still buildup trapped in there.
A misdiagnosis I see constantly: people assume a fridge that’s “not cooling as well as it used to” needs a refrigerant or compressor repair, when heavily insulated coils, coils so caked with dust they can’t release heat efficiently, are doing the actual damage. Cleaning coils that have gone unaddressed for two or three years sometimes resolves a cooling complaint entirely, no parts involved. It’s worth ruling out before assuming anything mechanical has failed.
How Often This Actually Needs Doing
For most households, every 6 months is a reasonable baseline for this front-access cleaning method, but that interval shifts meaningfully based on your situation, not just as a flat rule.
Homes with pets, especially shedding dogs or cats, tend to need this closer to every 3–4 months, since pet hair combines with dust to form a denser, faster-building layer than dust alone. Kitchens near carpeted areas or with poor room ventilation also tend to accumulate coil dust faster than kitchens with hard flooring and good airflow. Conversely, a well-ventilated kitchen with no pets can often stretch this to 8–9 months without meaningful buildup.
A physical clue that a household’s actual interval is lagging behind their cleaning schedule: check the compartment before your “annual” cleaning and see how compacted the layer already is. If you’re finding heavy, packed buildup well before your planned cleaning date, that’s your household telling you the interval needs to shorten, not a sign you did something wrong.
Comparison Table: Cleaning Tools by Coil Buildup Level
| Buildup Level | Signs | Recommended Tool | Time Needed |
| Light (routine, 6-month interval) | Thin visible dust layer, fins still distinct | Vacuum crevice attachment only | 5–10 minutes |
| Moderate (8+ months since last clean) | Grayish coating, some fin gaps less visible | Coil brush + vacuum combination | 15–20 minutes |
| Heavy (1+ year, pet household) | Compacted gray/black layer, fins look solid | Coil brush, soft paintbrush, vacuum, multiple passes | 25–35 minutes |
| Severe (multi-year neglect) | Dense matted buildup, visible airflow restriction | Full process above, possibly repeated over two sessions | 40+ minutes |
FAQ
1. How do I know if my LG refrigerator’s coils are front-accessible or on the back?
Check the bottom front edge of the cabinet for a removable grille running the width of the unit. If there’s a grille and it’s warm with a faint fan hum, you have front-access coils. If there’s no grille there, your model likely has rear-mounted coils instead.
2. Can I use compressed air instead of a vacuum and brush?
Compressed air alone tends to relocate dust deeper into the compartment rather than removing it; it works better as a light finishing pass after vacuuming and brushing, not as a standalone method.
3. Will cleaning the coils void my LG warranty?
Routine coil cleaning through an external kick-plate grille is standard homeowner maintenance and doesn’t involve opening sealed refrigerant components, so it typically doesn’t affect warranty coverage, though it’s worth checking your specific model’s documentation if you’re unsure.
4. Is it safe to clean the coils while the fridge is still plugged in?
No, unplug the unit first. The condenser fan inside the compartment can activate during normal operation, and having a brush or fingers near it while powered is an unnecessary risk for a task that takes minutes either way.
5. My kick-plate grille won’t come off easily. What am I doing wrong?
Most grilles release with firm, even pressure at the clip points rather than pulling from one corner. Check for hidden screws near the top edge first, since forcing a screwed panel by prying at the clips can crack the plastic.
6. Does a dirty condenser coil actually affect energy use, or just cooling?
Both. Coils working harder to release heat through a layer of insulating dust draw more power to maintain the same internal temperature, so a buildup that’s severe enough to affect cooling is also driving up energy use.
7. Can I clean front-access coils without removing the kick plate at all, just through the vents?
Not effectively; the vent slots restrict a vacuum or brush from actually reaching the fin surfaces, so you’ll clear surface dust near the opening but leave the bulk of the buildup untouched deeper in the compartment.
Worth the Twenty Minutes
A clean set of lg refrigerator condenser coils doesn’t just save you an energy bill line item; it’s one of the few maintenance tasks that directly extends the compressor’s working life, and on a front-access LG model, there’s genuinely no excuse to skip it for the “hassle” of moving the fridge, because you don’t have to. Pull the grille, run through the steps above, and put it on a repeating reminder before buildup has the chance to get ahead of you.