
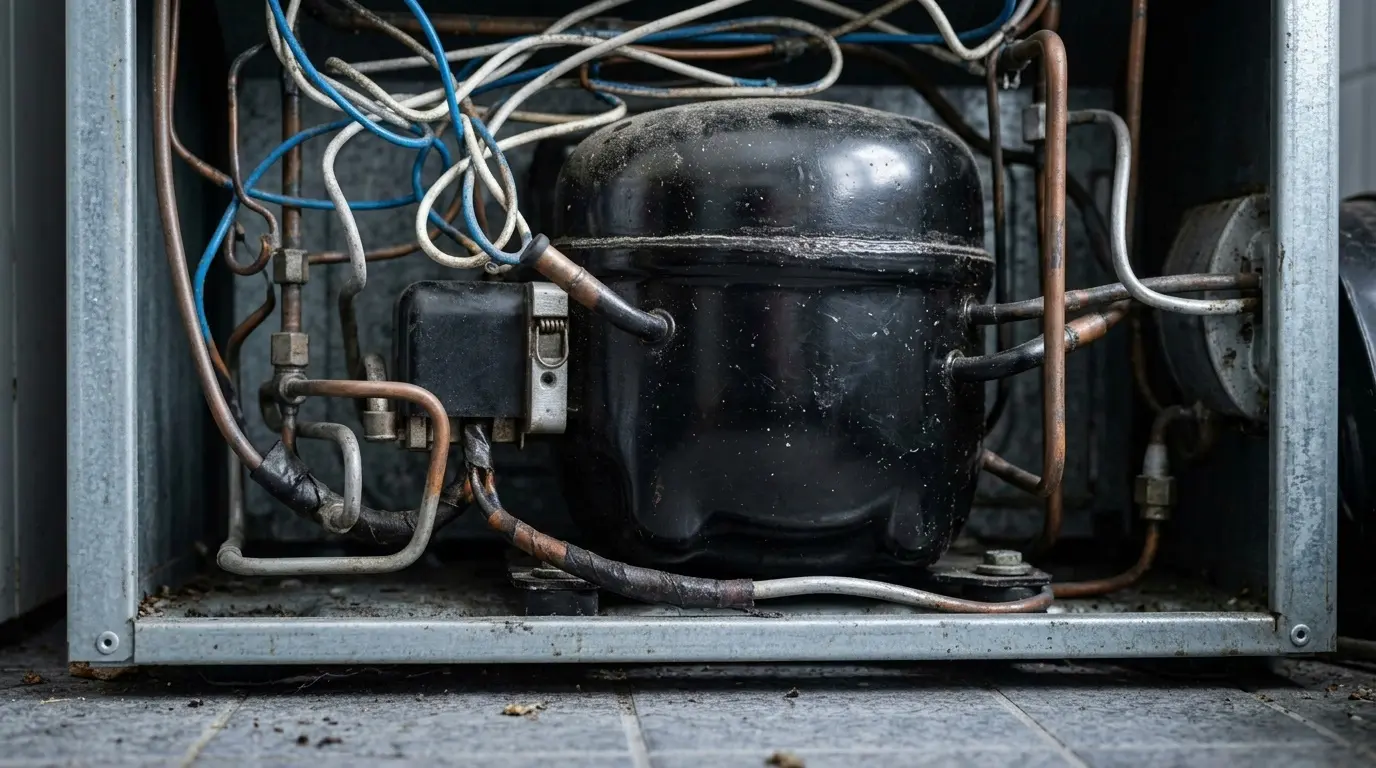
How a simple shake test proved the $800 technician wrong.
The 2 AM Wake-up Call: Maytag Fridge Clicking? It starts the protection loop. Click… silence… click. By morning, my Maytag freezer was a puddle of melted ice cream. A professional technician told me, “Your compressor is shot. Buy a new $2,000 fridge.” I felt sick. But before I gave up, I did a 5-minute check and realized: it wasn’t the $800 compressor; it was a tiny $25 plastic box called a start relay.
Table of Contents
1. The Clicking Loop: A Cry for Help
If your Maytag, Whirlpool, or Amana fridge is clicking every few minutes but not cooling, your machine is stuck in a protection loop, the compressor is trying to start, can’t get the spark it needs, and a safety fuse snaps it off before it overheats. That snap is the click you hear.
This symptom shows up across almost all Maytag French Door and side-by-side models, since they often share the same electrical start components.
This particular fix, the start relay, is one of several things that can cause clicking. If the shake test in the next section doesn’t confirm a dead relay, see our full breakdown of every cause of refrigerator clicking for the other likely culprits.
2. Physics of the Kickstart: The Water Pipe Analogy
To understand the fix, think of electricity like water in a pipe. Your compressor needs a large flow of current just to start spinning against the pressure of the cooling gas.
- The Start Relay acts like a valve that opens the pipe wide to give the motor a kick.
- The Failure: inside the relay is a small ceramic disc. Over time, heat causes this disc to shatter.
- The Result: the pipe stays blocked, the motor tries to start, gets dangerously hot, and the safety switch clicks it off.
Pro tip: this ceramic disc very often shatters because the fridge is struggling to breathe. If you haven’t cleaned your condenser coils in a while, the extra heat is a likely contributor to a dead relay.
3. The 5-Minute Shake Test Diagnosis
This is how I saved $2,000. You don’t need a multimeter or an engineering degree for this check, just your ears.
- Unplug the fridge. Never touch the back panel while the power is on.
- Locate the relay. It’s a small black or white box plugged into the side of the compressor (the big black tank).
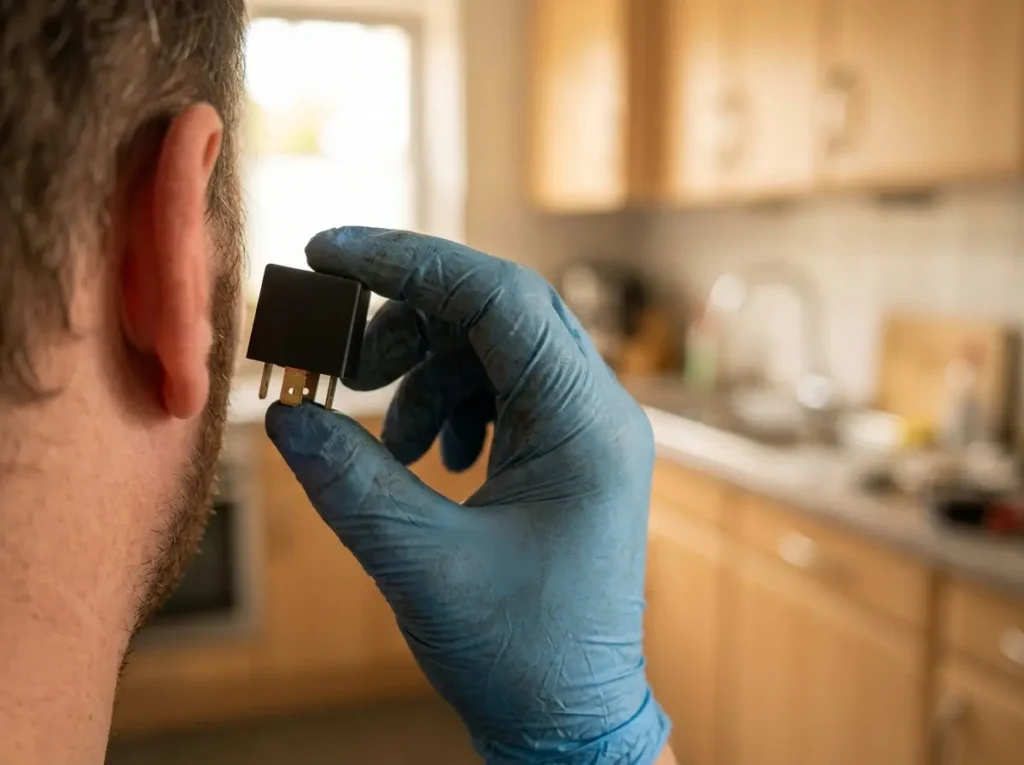
- Remove and shake it near your ear.
🔍 The Verdict
If the relay sounds like a box of broken glass or a baby’s rattle, the ceramic disc inside has almost certainly shattered. If it’s silent, the problem may be the compressor itself; a rattling relay is one of the more reliable DIY signs that a $25 part, not the compressor, is the culprit.
4. Repair vs. Replace: The Cost Audit
Before you decide to scrap your machine, look at the numbers. Many technicians default to recommending a new unit because it’s more profitable for them than a small parts repair.
| Factor | DIY Relay Fix | Full Repair | New Fridge |
| Average Cost | $25 – $40 | $600 – $900 | $1,800 – $3,000 |
| Time Required | ~20 minutes | 3-5 days | Delivery wait |
| Skill Level | Beginner | Expert only | N/A |
If you’re wondering whether newer models have fixed this issue, our audit below covers whether current-generation Maytag side-by-sides still use the same relay design.
👉 [Maytag Side-by-Side 2026 No-Nonsense Audit]
5. Tools & Parts You’ll Need
| Tool/Part | Purpose |
| New relay, matched to your compressor’s exact rating | The actual replacement part, see the rating note in Step 6 |
| Insulated-handle screwdriver | Discharging the capacitor and prying the bale wire |
| Safety glasses | Eye protection during capacitor discharge |
| Work gloves | Protects hands from sharp compressor housing edges |
| Phone or camera | Photographing the original wiring before disconnecting anything |
| Flashlight | Seeing the pins and wiring clearly behind the fridge |
6. The Don’t-Get-Zapped Safety Audit
Before you touch the compressor, read this in full; it’s the most important section on this page.
- Unplug the fridge at the wall outlet, not just at any switch. Confirm it’s unplugged, not just powered off.
- Watch for the run capacitor. Many (not all) Maytag compressors have a run capacitor attached near the start relay, a white or black cylinder. Even after the fridge is unplugged, this part can hold a stored electrical charge for hours, similar to a battery.
- If you’re not sure whether your unit has a capacitor, treat any cylindrical component near the relay as potentially charged rather than assuming it’s safe, or stop here and call a technician if you can’t positively identify the parts you’re looking at.
- Wear safety glasses during capacitor discharge; the small spark it produces is normal, but it’s still a spark near your face.
- Wear gloves when handling the compressor housing and any removed panels; edges can be sharp.
- Be careful pulling the fridge away from the wall if it has an icemaker or water line connected; you don’t need to shut the water off for this repair, but avoid kinking or stretching the line.
- Stop and call a licensed technician if the compressor housing is still noticeably hot more than an hour after unplugging, you see melted or scorched wiring, or you’re not confident identifying which component is the capacitor. None of these are signs to push through on your own.
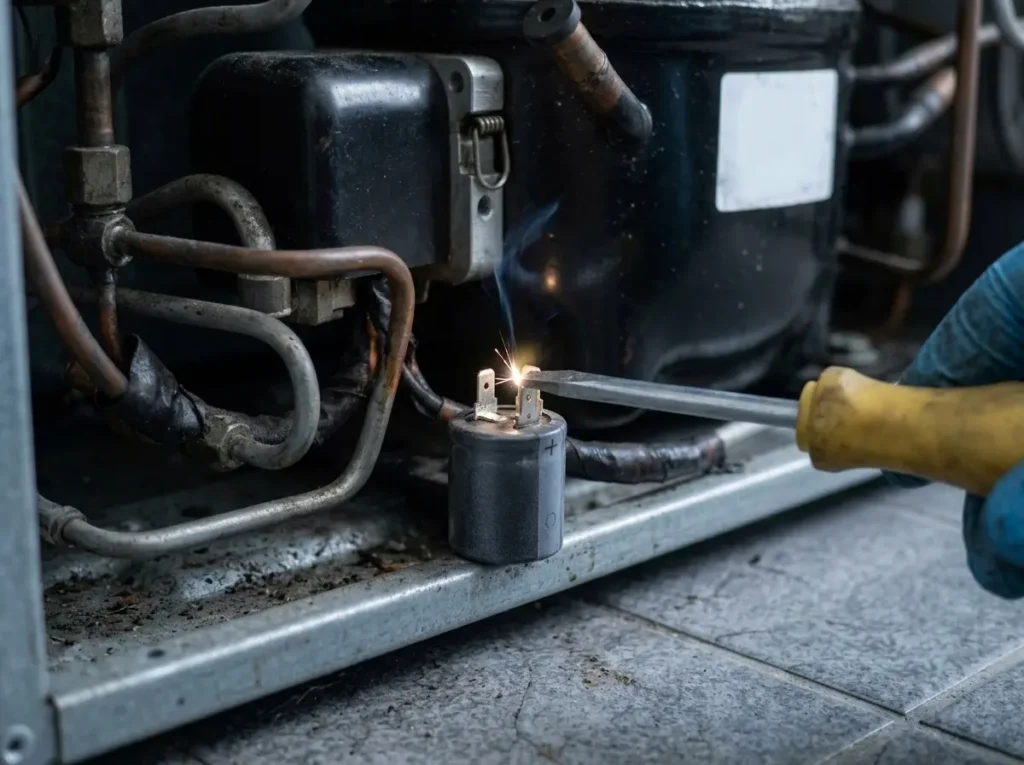
⚠️ How to Discharge a Capacitor Safely
This is the step that separates the pros from the amateurs: bleed the stored energy before touching the terminals.
- Insulated tool: use a screwdriver with a heavy rubber or plastic handle. Never use a plain, uninsulated metal tool.
- The bridge: holding only the insulated handle, touch the metal shaft of the screwdriver across both metal terminals (posts) of the capacitor at the same time.
- The spark: you may see a small spark or hear a pop. This is normal; it’s the stored electricity leaving the capacitor. Once done, the part is safe to handle.
7. The Step-by-Step Resurrection Process
Now that your machine is safe and your new start relay is ready, follow these steps. This process applies to most conventional single-speed Maytag compressors.
A 2026 note worth checking first: newer inverter-compressor refrigerators (increasingly common in current model lineups) use a variable-speed control board instead of a simple start relay. If your model uses an inverter compressor, this specific relay swap doesn’t apply; check your compressor type before ordering a part.
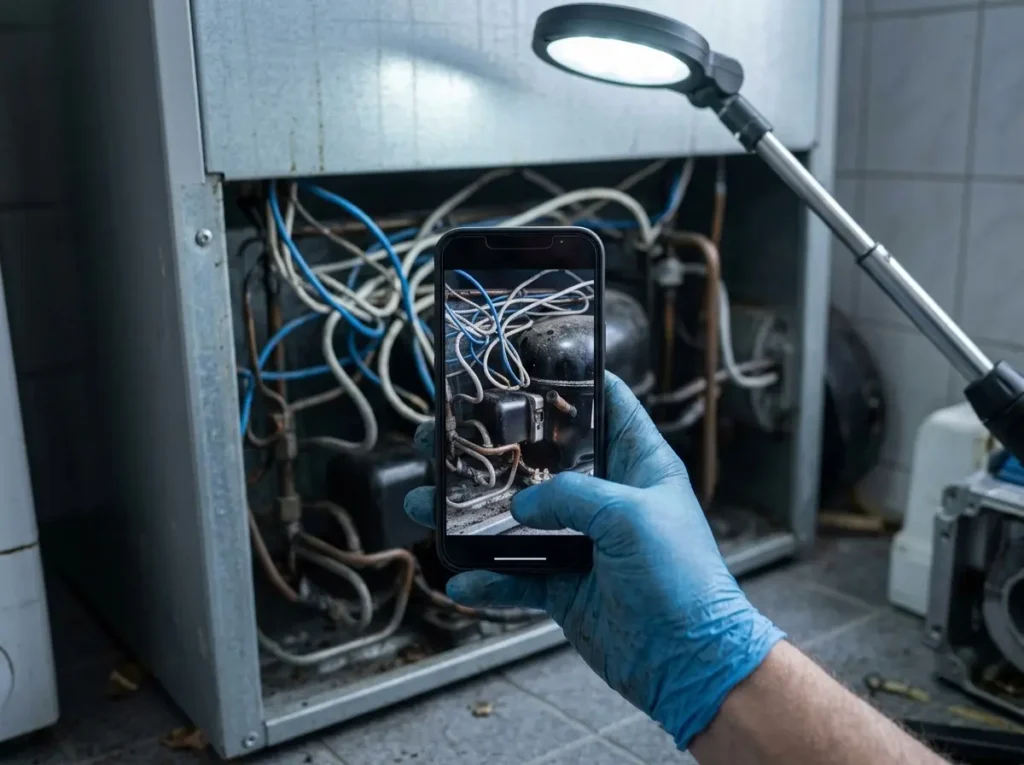
- The Photo Rule: before pulling any wires, take a high-resolution photo of the original wiring. Most Maytags use a blue and white/pink wire configuration; crossing these can fry the new relay instantly.
- Pop the Bale Wire: a stiff metal clip (bale wire) holds the relay onto the compressor. Use a flathead screwdriver to gently pry it off without bending it; you’ll need it to lock the new part in place.
- The Swap: pull the old, rattling relay off the three metal pins on the compressor. Align the holes on your new relay with those pins and push it on firmly; you should feel a solid click when it seats.
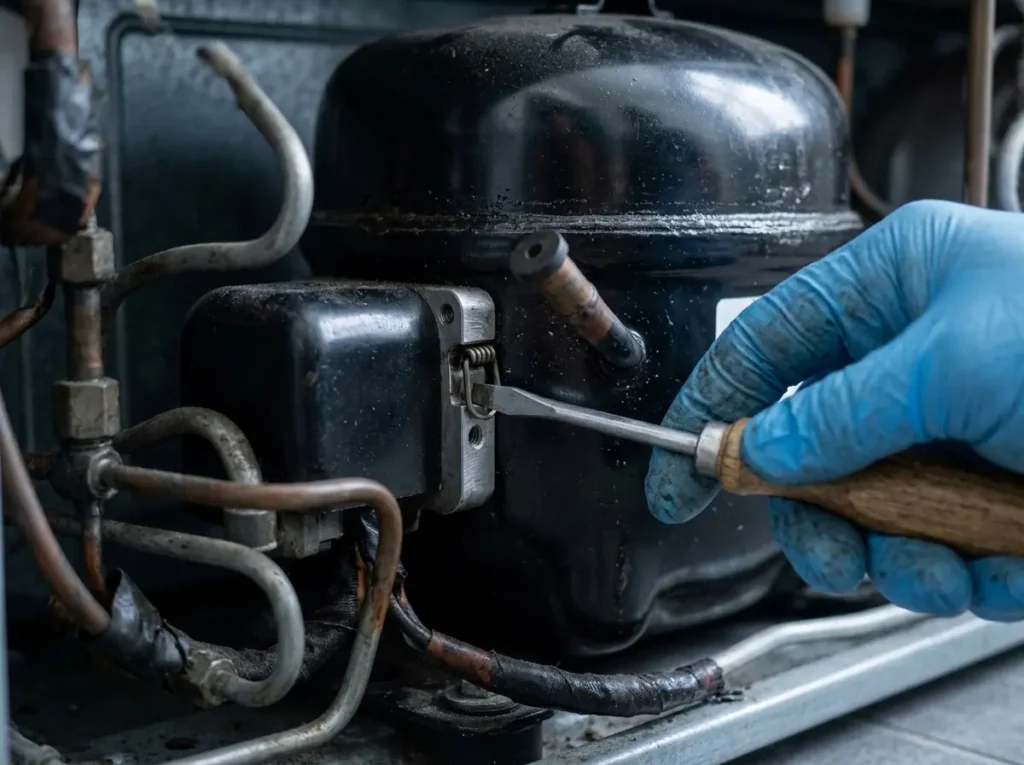
Insider tip most guides skip: don’t just match the new relay by physical shape. Check the amp/model rating stamped on the old relay and buy an exact match, or one explicitly rated for your compressor’s horsepower and starting current. A relay that fits the pins but is rated for the wrong load can fail to protect the compressor properly, which risks the exact expensive failure you’re trying to avoid.
8. Should You Use a 3-in-1 Hard Start Kit?
In your research, you’ll come across a part called a 3-in-1 Hard Start Kit, a universal kit that bypasses the original relay. As tempting as it is, here’s the catch: modern Maytag compressors are precision-engineered, and a 3-in-1 kit provides a much larger inrush current that can be too aggressive for newer, efficient motors.
Use an OEM (Original Equipment Manufacturer) relay whenever possible. Treat a 3-in-1 kit as a last resort, something to buy a dying compressor a few more months, not a long-term fix.
9. Expert FAQ: Maytag fridge clicking?
Q: What if the new relay clicks too?
A: If a brand-new relay clicks, the internal motor of the compressor is likely grounded or locked up. At that point, a full repair or replacement is the realistic option; see our side-by-side audit linked above if you’re leaning toward a new unit.
Q: Why did my relay burn out in the first place?
A: Heat is the most common driver; clogged coils force the compressor to run longer and hotter than it should, and that heat is what tends to shatter the ceramic disc inside the relay. Cleaning your coils regularly is the main way to prevent a repeat failure.
Q: How do I make sure I’m buying the right replacement relay?
A: Match the rating stamped on your old relay (not just the physical shape) to the new one, or look up the relay specified for your exact model number. A visually similar but wrong-rated relay can fail to protect your compressor.
Q: Is it safe to use a universal or off-brand relay instead of OEM?
A: It can work, but OEM or a properly rated equivalent is the safer bet. A poorly matched universal relay is one of the more common reasons a “fixed” fridge fails again within weeks.
Q: How long does this repair actually take?
A: For most people, about 20-30 minutes once the fridge is unplugged and pulled out, including the shake test, this isn’t a full-day project.
Q: Can a bad start relay damage the compressor if I don’t fix it quickly?
A: A relay stuck in the clicking loop repeatedly stresses the compressor with failed start attempts. It’s not an emergency measured in hours, but it’s not something to leave for months either.
Q: My fridge doesn’t seem to have a visible capacitor; do I still need to worry about a charge?
A: If you can’t positively identify a capacitor near the relay, don’t assume there’s nothing to discharge. Treat any unfamiliar cylindrical component with caution, and when in doubt, stop and consult a technician rather than guessing.
Conclusion
That night, I saved $2,000 because I refused to let a clicking sound intimidate me. Machines aren’t magic; they’re a collection of parts, and a rattling start relay is one of the most fixable sounds a fridge can make. If your Maytag is clicking, work through the shake test, respect the safety steps above, and take the $25 chance before you call the truck.
If the shake test comes back silent, or a new relay clicks too, don’t keep guessing; check the full diagnostic guide below for what else could be going on.