
Your Samsung refrigerator is packed with ice, and not in the places you want it. The freezer walls are frosted over, food is partially thawed, and the fridge compartment feels warm. Sound familiar? There is a very good chance your defrost heater has failed.
The defrost heater is one of those small parts that most people never think about until it stops working. When it does, frost builds up on the evaporator coils, blocks airflow, and your whole fridge starts struggling. Replacing it yourself is very doable. It takes about 90 minutes, costs $15 to $35 for the part, and you do not need to be an appliance technician to do it.
In this guide, you will learn exactly how the Samsung Refrigerator defrost heater works, how to know when it needs replacing, what tools you need, and a clear step-by-step walkthrough to get your fridge running normally again. Let us get into it.
Table of Contents
What Is a Samsung Refrigerator Defrost Heater, and What Does It Do?
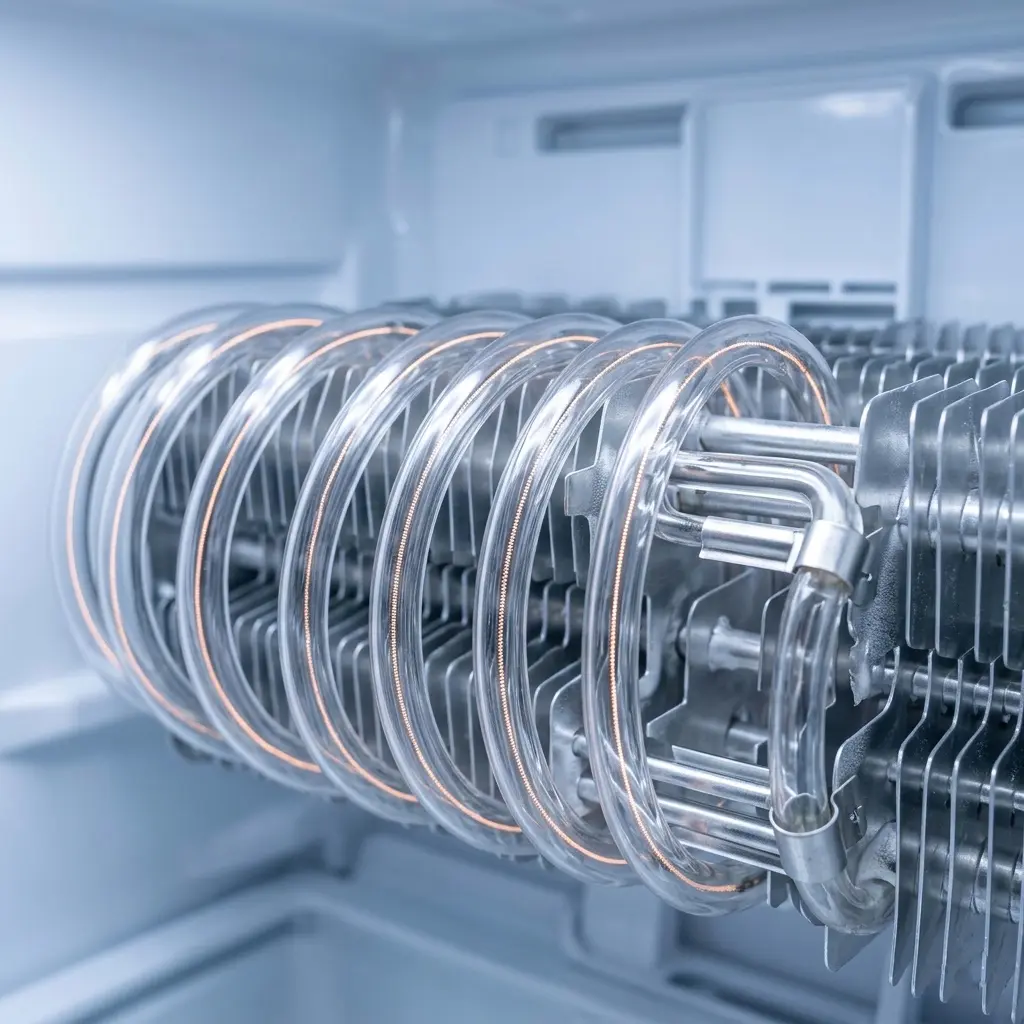
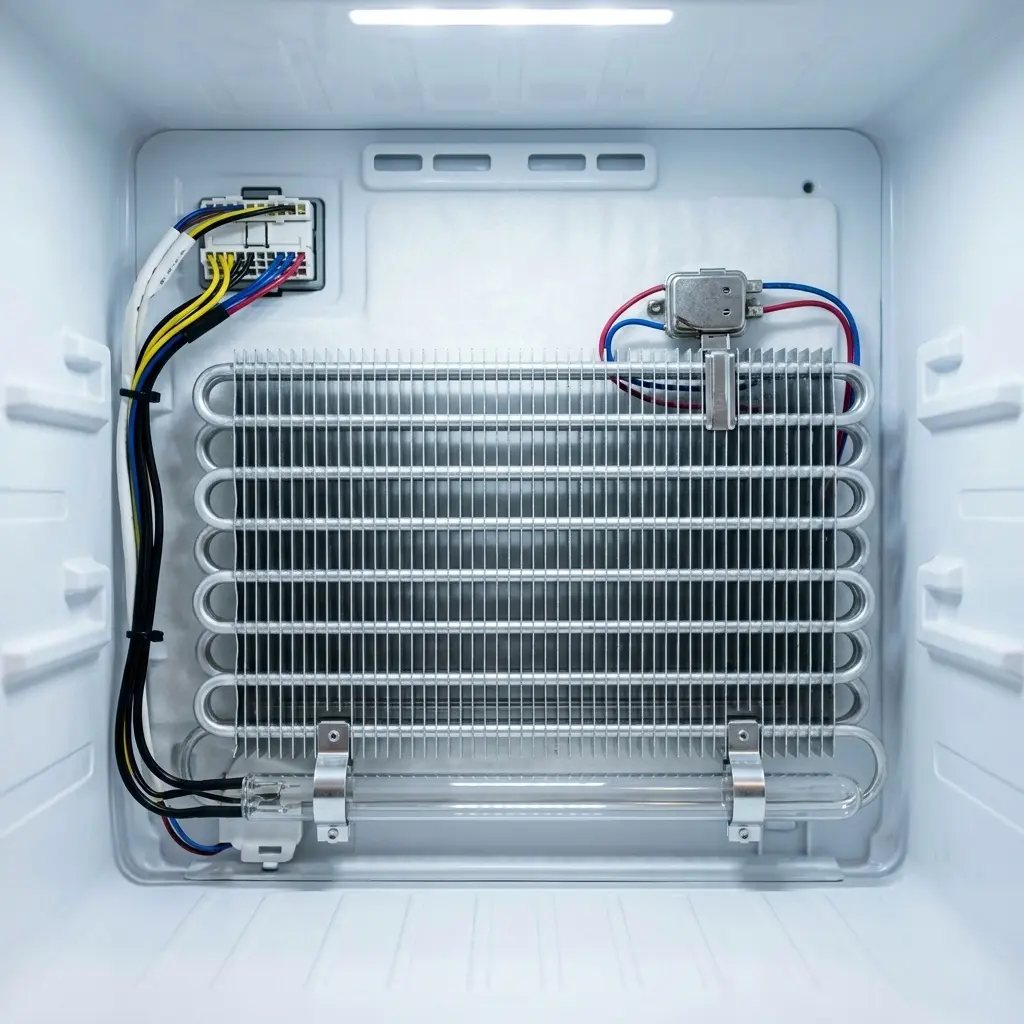
Your Samsung fridge runs a defrost cycle automatically, usually once or twice every 24 hours. During this cycle, the defrost heater, a glass or metal heating element wrapped around or mounted near the evaporator coils, heats up to melt any frost that has formed on the coils.
Without this cycle, frost accumulates on the evaporator coils. Over time, that frost becomes thick enough to block the fan from circulating cold air through the fridge. The result is a refrigerator that cannot cool properly, even though the compressor is still running.
The heater works together with two other components, the defrost thermostat (which monitors temperature) and the defrost timer or control board (which initiates the cycle). If any one of these fails, the whole system stops. But the heater itself is the most common failure point.
Samsung Refrigerator Defrost Heater, Key Specs and Facts
| Specification | Details |
| Operating voltage | 120V AC (North America) / 220to240V AC (international models) |
| Wattage (typical) | 110W to 200W depending on model |
| Normal cycle frequency | Every 8 to12 hours automatically |
| Defrost duration per cycle | 20 to 30 minutes |
| Part cost (OEM) | $15 to $35 USD |
| Labor cost (professional) | $150 to $250 USD |
| DIY time to replace | 60 to 90 minutes |
| Common failure symptom | Frost buildup on evaporator coils |
| Heater lifespan | 7 to 12 years (average) |
| Compatible fridge types | French door, side-by-side, top-freezer, bottom-freezer |
Signs Your Samsung Refrigerator Defrost Heater Has Failed
Before you pull the fridge apart, it helps to confirm the defrost heater is actually the problem. Here are the clearest signs to watch for.
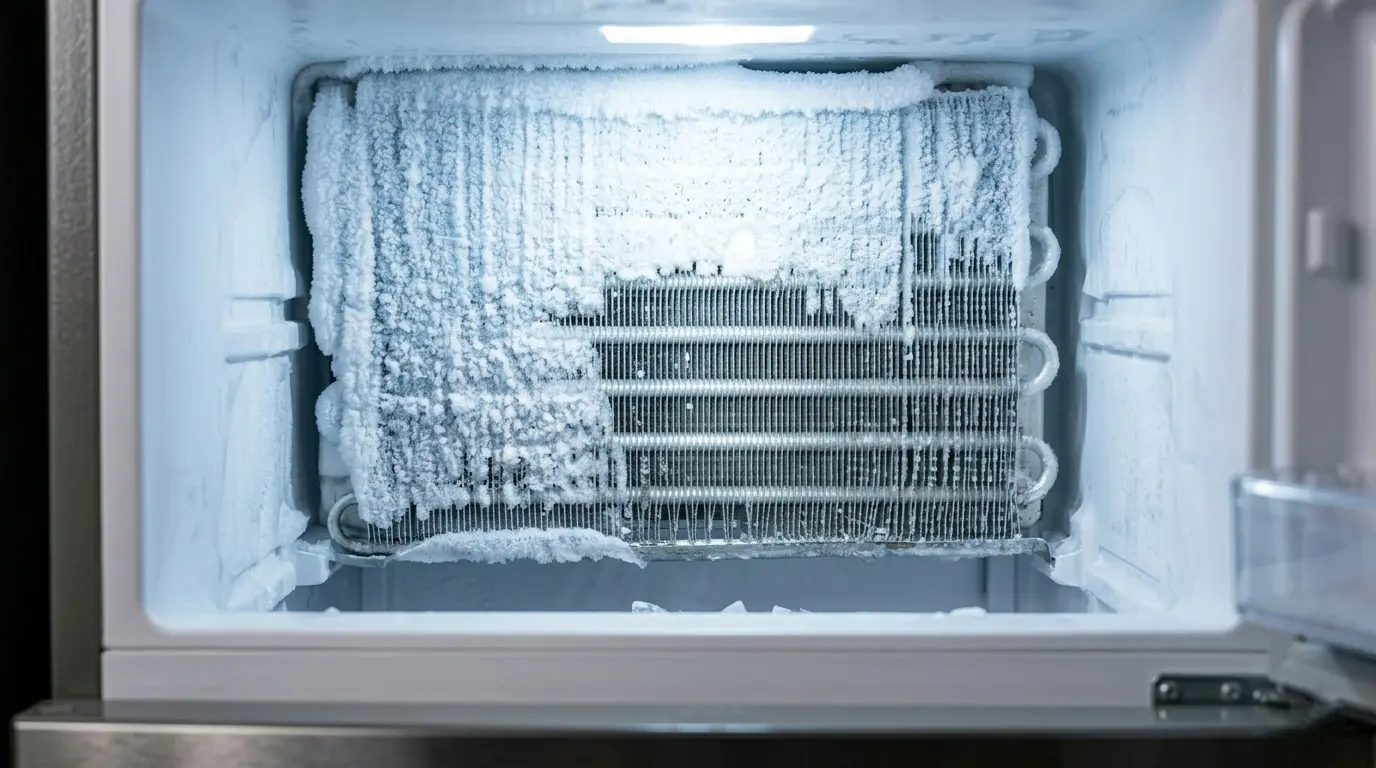
Frost Buildup on Evaporator Coils
This is the number one sign. Remove the rear panel inside the freezer. If you see a thick layer of ice or frost covering the coils, sometimes an inch or more, the defrost heater has almost certainly stopped working. The coils should be mostly clear after a completed defrost cycle.
Fridge Not Cooling but Freezer Is Fine
This one confuses a lot of people. If your freezer feels cold but the refrigerator compartment is warm, frost is likely blocking the evaporator fan. That fan sits right next to the coils, and when ice blocks it, cold air stops flowing into the fridge section.
Loud Buzzing or Fan Noise
A buzzing or rattling sound, especially from the back of the freezer compartment, can mean the fan blades are hitting frost buildup. This is a secondary symptom of a failed defrost heater.
Error Codes on Samsung Display
Some Samsung models display error codes when the defrost system fails. The codes 5E, SE, or 22E on Samsung fridges often relate to defrost sensor or heater issues. Check your model’s manual or Samsung’s official support site for exact codes.
| ⚠️ WARNING: Before assuming the heater is bad, check the defrost thermostat and defrost sensor too. Use a multimeter to test resistance. A failed thermostat or sensor can mimic a failed heater, but the fix is different. |
Tools and Parts You Need Before You Start
Getting everything ready before you open the fridge saves time and frustration. Here is exactly what you need.
Tools Required
- Phillips head screwdriver (#2)
- Flathead screwdriver (for prying clips)
- Multimeter (to test the old heater)
- Needle-nose pliers
- Putty knife or plastic pry tool
- Hair dryer or heat gun (optional, speeds up ice melting)
- Towels and a small bucket (for water from melting ice)
- Zip ties or electrical tape (for wire management)

Finding the Right Replacement Heater
Do not guess on the part number. Samsung refrigerators use different heater assemblies across model lines. Using the wrong heater can damage your fridge or simply not work at all.
Your model number is on a sticker inside the fridge, usually on the left wall of the fresh food compartment, or along the door frame. It looks like RF28R7351SG or RFG297HDRS.
Samsung Refrigerator Defrost Heater Compatibility Reference
| Samsung Model Series | Heater Part Number (OEM) | Fridge Type | Wattage |
| RF28R, RF23R series | DA47-00244W | French Door | 125W |
| RS27T, RS28A series | DA47-00246A | Side-by-Side | 140W |
| RH25H, RH29H series | DA47-00322B | French Door (4-door) | 130W |
| RT18M, RT21M series | DA47-00140C | Top Freezer | 110W |
| RB215, RB217 series | DA47-00188B | Bottom Freezer | 115W |
| RF263, RF268 series | DA47-00244A | French Door | 120W |
Always verify the part number against your specific model number before ordering. Samsung’s official parts website (Samsung.com) lets you enter your model number to confirm compatibility.
How to Replace Samsung Refrigerator Defrost Heater, Step by Step
| ⚠️ SAFETY FIRST: Unplug the refrigerator from the wall before doing anything. Never work on an appliance that is still connected to power. This is non-negotiable. |
Step 1, Empty and Unplug the Freezer
- Remove all food from the freezer compartment and place it in a cooler with ice.
- Unplug the refrigerator from the power outlet. Do not just turn it off, unplug it.
- Leave the freezer door open for 20to30 minutes to let some ice soften. This makes the next steps easier.
Step 2, Remove the Freezer Shelves and Drawers
- Take out all shelves, drawers, and ice maker components (if present).
- On French door models, lift the ice maker assembly up and disconnect the wiring harness before setting it aside.
- Remove the ice maker mounting screws (usually 2to3 Phillips screws).
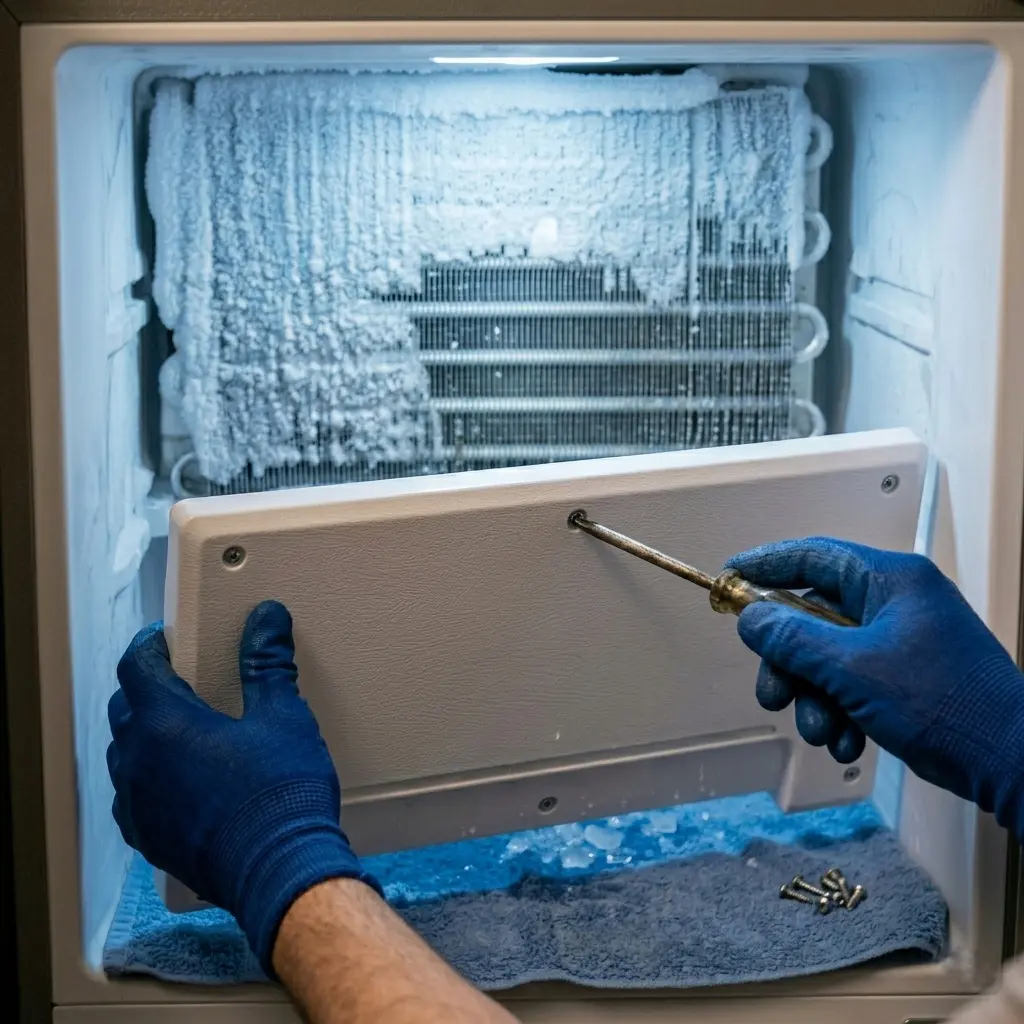
Step 3, Remove the Rear Freezer Panel
- Locate the screws around the perimeter of the rear panel. Most Samsung models have 4to8 screws, often hidden under plastic caps.
- Pop off any plastic screw covers with your flathead screwdriver.
- Remove all screws and keep them in a small bowl, they are easy to lose.
- Gently pull the panel away from the wall. Some models have wire clips along the edges. Slide a plastic pry tool along the seam to release them.
- You will now see the evaporator coils covered in frost. This confirms the defrost heater has not been doing its job.
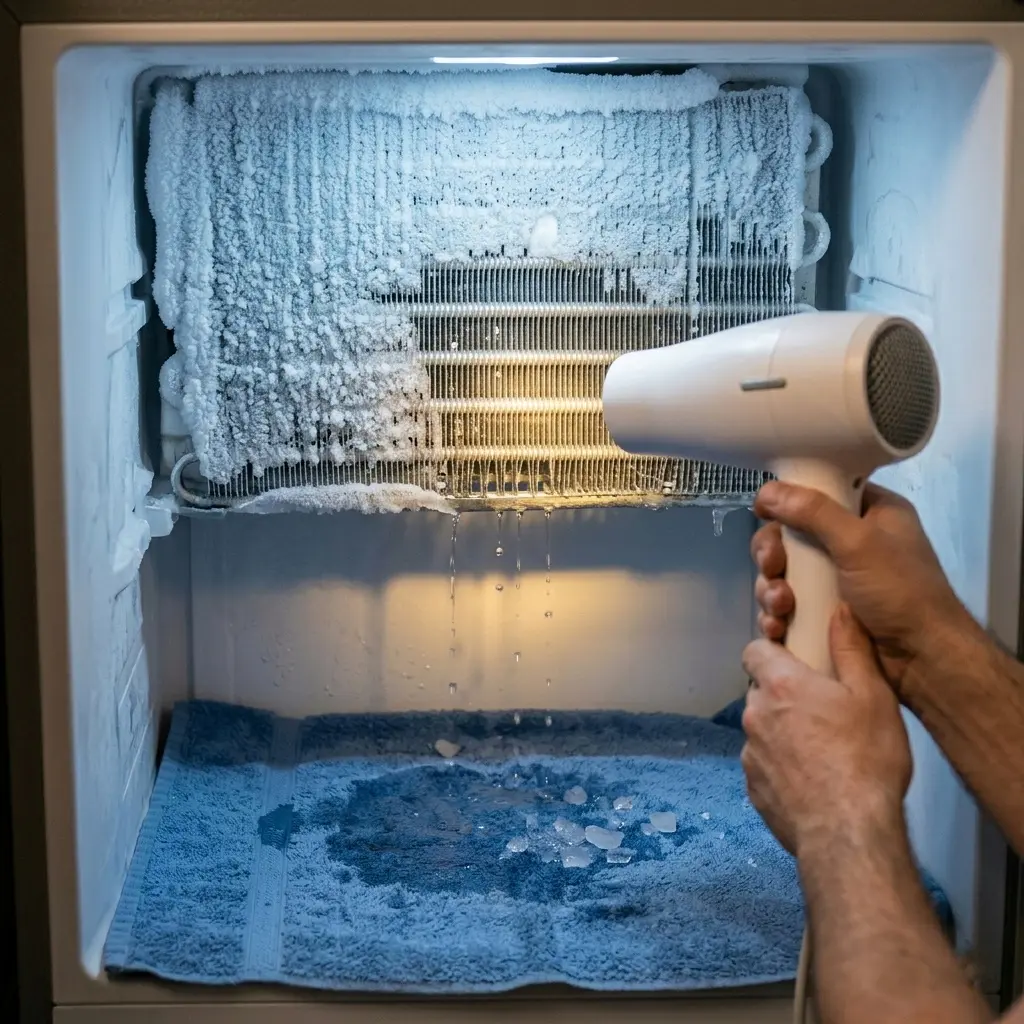
Step 4, Melt the Remaining Ice
Before you can access the heater, you need to remove the ice covering it. There are two ways to do this.
- Option A (slow): Leave the fridge unplugged with the door open for 2to4 hours until the ice melts naturally.
- Option B (fast): Use a hair dryer on low heat, held at least 6 inches from the coils, to melt the ice. Never use a heat gun on high, it can damage the plastic.
Place towels on the floor and a bucket under the fridge to catch water.
| 💡 PRO TIP: Do not use a knife or screwdriver to chip ice off the coils. You can pierce a refrigerant line and turn a $25 repair into a $400 refrigerant recharge. |
Step 5, Disconnect and Remove the Old Heater
- Once the ice is gone, locate the defrost heater. On most Samsung models, it is a glass tube element that runs along the bottom or across the evaporator coil assembly.
- Trace the heater wires to the wire harness connector. It usually clips in near the side of the coil assembly.
- Press the tab on the connector and pull it apart. Do not yank on the wires themselves, pull from the plastic connector housing.
- The heater is typically held in with two small clips or brackets. Slide or unclip these with your needle-nose pliers.
- Carefully remove the old heater from the coil assembly. Note which direction it was oriented, the new one goes in the same way.
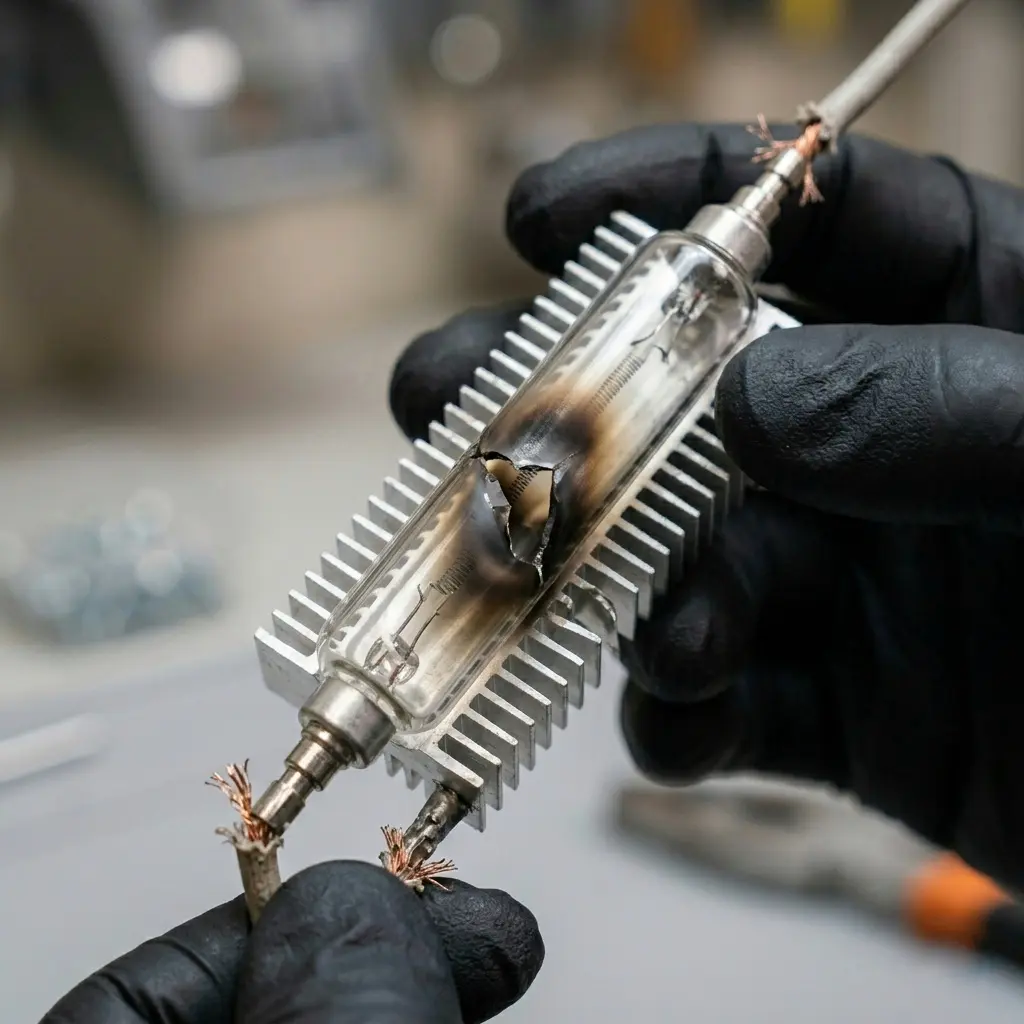
Step 6, Test the Old Heater with a Multimeter
Set your multimeter to resistance (ohms). Touch the probes to the two terminals on the old heater. A working heater reads 15to80 ohms depending on wattage. If you get a reading of OL (overload/open circuit) or infinite resistance, the heater is confirmed bad.
| 💡 PRO TIP: Test the defrost thermostat at the same time. Disconnect it and check resistance at room temperature, it should read close to 0 ohms (closed circuit). If it reads open, replace the thermostat too while you have everything apart. |

Step 7, Install the New Heater
- Slide the new defrost heater into position in the coil assembly the same way the old one sat.
- Secure it with the mounting clips or brackets. It should sit snug with no movement.
- Connect the wiring harness. Push the connector until it clicks. Give it a gentle tug to confirm it is locked.
- If there is a defrost thermostat clipped to the coil, check that it is properly seated and not loose.
Step 8, Reassemble the Freezer
- Reattach the rear freezer panel. Start screws by hand first, then tighten them evenly.
- Replace any plastic screw covers.
- Reinstall the ice maker (if removed) and reconnect its wiring harness.
- Put back all shelves and drawers.
Step 9, Test the Repair
- Plug the refrigerator back in.
- Set the freezer to -2°F (-19°C) and the fridge to 37°F (3°C).
- Wait 24 hours and check that the fridge is cooling properly.
- After 24 hours, if you want to confirm the heater is working, put the fridge into forced defrost mode. On most Samsung models, hold the Energy Saver and Fridge buttons simultaneously for 8 seconds. The display will show ‘Fd’ and the heater will activate. You can use your multimeter on AC voltage mode to confirm voltage is reaching the heater.
Common Mistakes to Avoid
| ⚠️ WARNING: These mistakes are the most common reasons a DIY defrost heater replacement fails or causes new problems. |
- Buying the wrong part: Always cross-reference your model number. A heater from a different Samsung model may fit physically but have the wrong wattage, which can damage the thermostat or fail quickly.
- Not testing the thermostat: If you replace just the heater but the thermostat is also faulty, the heater will burn out again within a few weeks because the thermostat won’t shut it off correctly.
- Not melting ice properly: Trying to force the panel off when ice is still holding it in place can crack the panel or break wire clips. Take the time to let the ice melt fully.
- Overtightening screws: The rear panel is plastic. Overtightening can crack it or strip the screw holes. Finger-tight plus a quarter turn is usually enough.
- Skipping the test: Always run the fridge for 24 hours before declaring success. Some problems only appear once the fridge is up to temperature.
- Forgetting to reconnect the ice maker wiring: A common oversight that leaves the ice maker dead after the repair.
Pro Tips from Appliance Technicians
| 💡 TIP 1: Replace the defrost thermostat every time you replace the heater. The two parts work as a pair, and the thermostat costs only $8to$15. If the thermostat fails a month after your repair, you will have to pull everything apart again. |
| 💡 TIP 2: Take photos at every step before you remove anything. This includes the wire harness connections, screw locations, and how the heater sits in the coil assembly. Your future self will thank you during reassembly. |
| 💡 TIP 3: After reassembly, wipe the door gaskets with warm water and dish soap. If frost got into the gasket area, it can cause the seal to stick or tear. A clean gasket seals better and lasts longer. |
| 💡 TIP 4: If your fridge is more than 10 years old and you are already replacing the heater, check the evaporator fan motor blade while you have everything open. If the blades are worn or the motor is stiff, replace it at the same time. Fan motor assemblies for Samsung fridges run $20to$45. |
| 💡 TIP 5: Samsung has released firmware updates for some Wi-Fi-connected models that change defrost cycle behavior. If your model has SmartThings integration, check the Samsung SmartThings app for available updates after your repair. An outdated firmware version can cause premature frost buildup even with a new heater. |
👉Read More: [Samsung refrigerator not cooling, causes and fixes]
FAQ, Samsung Refrigerator Defrost Heater Replacement
1. How do I know if my Samsung Refrigerator defrost heater is bad?
The most reliable test is to pull the rear panel inside the freezer. If you see heavy frost on the evaporator coils, the defrost heater is likely not working. Confirm it with a multimeter, a failed heater will read infinite resistance (open circuit) instead of the normal 15to80 ohms range.
2. How long does it take to replace a Samsung Refrigerator defrost heater?
For a first-timer, expect 60to90 minutes for the actual repair work, plus 2to4 hours for ice melting if you choose the natural defrost method. If you use a hair dryer to speed up ice melting, you can complete the whole job in under 2 hours. Experienced technicians typically finish in 45to60 minutes.
3. What is the part number for a Samsung Refrigerator defrost heater?
The part number depends on your specific Samsung model. Common OEM numbers include DA47-00244W (French door models), DA47-00246A (side-by-side models), and DA47-00140C (top-freezer models). Always check using your model number on Samsung’s parts website or a trusted parts supplier like Genuine Parts or RepairClinic.
4. Can I use a non-OEM replacement heater?
You can, but there are risks. Aftermarket heaters are cheaper ($8to$20 vs $20to$35 for OEM), but the wattage or resistance may not match Samsung’s specifications exactly. This can cause premature failure or inaccurate defrost cycles. For a repair that lasts, OEM or OEM-equivalent parts are the safer choice.
5. Do I need to replace the defrost thermostat at the same time?
Not always, but it is strongly recommended. The defrost thermostat is the component that shuts off the heater when the coils reach the right temperature. If it is failing, it can let the heater run too long and burn it out again. Since thermostats only cost $8to$15 and you already have everything apart, replacing both at once is smart preventive maintenance.
6. My fridge still has frost after replacing the heater, what now?
First, check that the wiring connector is fully seated, a partial connection can cause intermittent heater operation. Next, test the defrost thermostat and defrost control board (or timer on older models). Also check the evaporator fan motor, if it is not running, cold air will not circulate even if the defrost cycle is working perfectly. If all those components test fine, the issue may be a refrigerant leak, which requires a professional.
7. Is it worth replacing the defrost heater, or should I just buy a new fridge?
At $15to$35 for the part, replacing the heater is almost always worth it, especially if your Samsung fridge is less than 8 years old. Even a 10-year-old Samsung fridge has significant life left if the compressor is sound. The math is simple: $35 repair cost vs $800to$2,500 for a new comparable Samsung model. Unless your fridge has multiple failing systems simultaneously, repair is the sensible choice.
Conclusion
Replacing a Samsung Refrigerator defrost heater is one of the most rewarding DIY appliance repairs you can do. You spend $15to$35 on a part, invest 90 minutes of your time, and save yourself $150to$250 in professional repair costs, while also getting your fridge back to perfect working order.
The key is taking your time, testing the old heater before assuming it is bad, and replacing the thermostat alongside the heater for a repair that actually lasts. Follow the steps in this guide and you will not have any surprises.
If you found this guide helpful, check out our related articles on Samsung fridge repairs and maintenance below. And if you run into trouble at any step, drop your question in the comments, we read every one.