
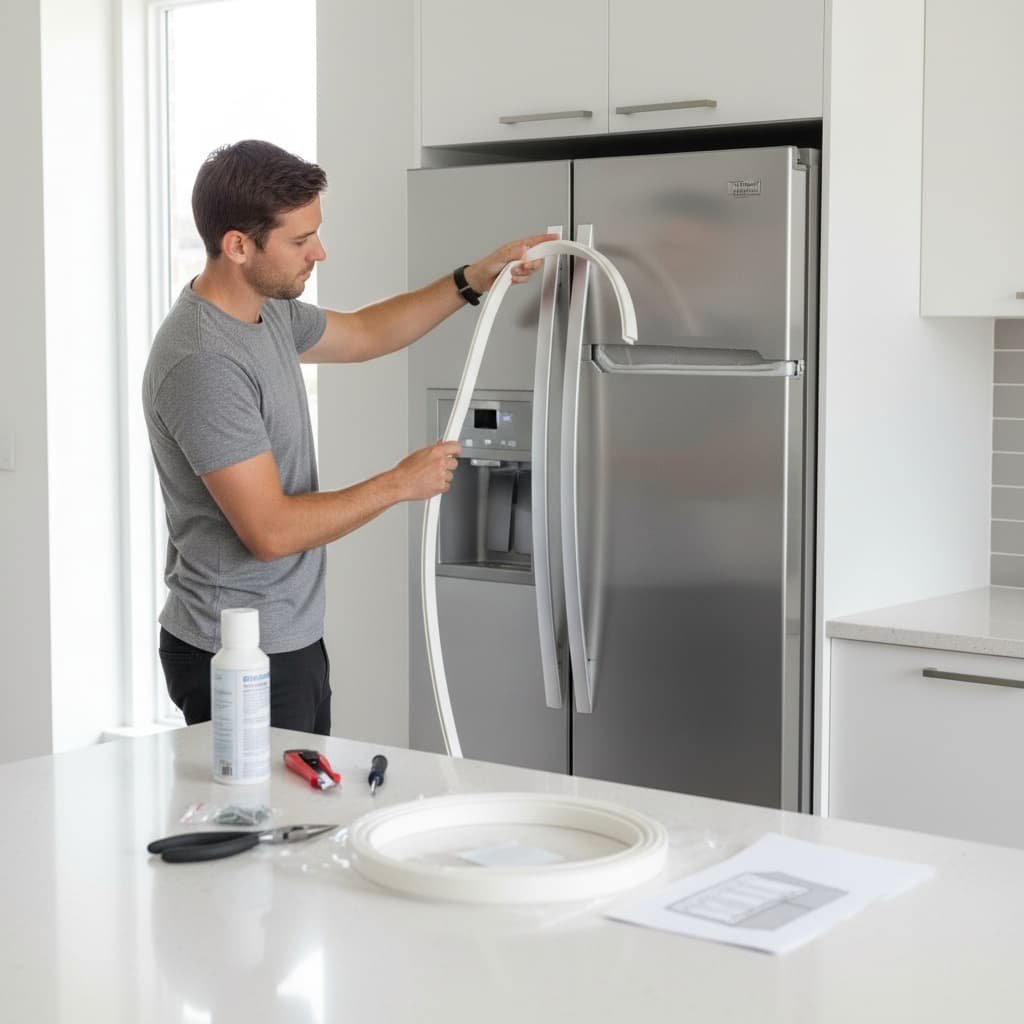
Is your counter-depth refrigerator door seal worn out and not closing properly? You might notice warm air entering, frost buildup, or higher electricity bills. A damaged seal allows cold air to escape, forcing your fridge to work harder.
In this 2026 guide, you’ll learn how to check, clean, and replace a refrigerator door gasket step-by-step, all without calling a technician.
Table of Contents
Why the Door Seal Matters
The door seal (gasket) keeps the cold air inside your refrigerator. It ensures food stays fresh and the compressor doesn’t overwork.
Inside every gasket is a thin magnetic strip running the full length of the rubber. This strip is what actually pulls the door flush against the cabinet frame, creating an airtight seal. Once the rubber cracks or the magnet weakens with age, that pull weakens too; even if the door looks like it’s closing normally, cold air can still be leaking out around the edges without you noticing until your energy bill or your food tells you.
A failing seal doesn’t just cost you money on electricity. It also shortens the life of the compressor, since the motor has to run longer and more often to compensate for the lost cold air. Left unaddressed for months, this extra strain can contribute to a compressor failing years earlier than it should.
- Temperature fluctuations inside the fridge.
- Moisture or frost buildup around the door.
- Increased energy bills due to cooling loss.
According to Energy Star, poor door seals can waste up to 15% more energy annually.
Common Causes of a Worn Door Seal
Door seals don’t usually fail overnight; they wear down gradually from everyday use and environmental factors. Knowing the cause can help you prevent the next one from wearing out early.
- Age and material fatigue: rubber naturally hardens and loses flexibility over years of expansion and contraction as the fridge cycles on and off.
- Direct sunlight or nearby heat sources: a fridge placed near a window or oven can see faster rubber breakdown on the side facing the heat.
- Harsh cleaning chemicals: bleach, ammonia, and abrasive cleaners strip the rubber’s natural oils, making it brittle faster than mild soap and water would.
- Frequent door slamming: repeated hard impacts stress the seal’s edges and can cause it to separate from the door frame over time.
- Overloaded door shelves: heavy jars and bottles on the door bins pull the door slightly out of alignment, putting uneven pressure on one section of the seal.
Signs Your Counter-Depth Refrigerator Door Seal Is Worn Out
- The door won’t close tightly.
- Warm air inside even when set to the correct temperature.
- Cracks or splits are visible on the rubber seal.
- Sticky or brittle texture when touched.
- Paper test: if it slides out easily, the seal is failing.

How to Tell Which Stage Your Seal Is In
| Seal Condition | What You’ll Notice | Action Needed |
| Slightly stiff, no cracks | Minor temperature drift | Clean + apply gasket lubricant |
| Visible cracks or splits | Frost buildup, warm spots | Replace seal (DIY) |
| Fully detached or torn | The compressor runs constantly | Replace seal immediately |
| Passes paper test | No visible wear | No action needed |
Tools You’ll Need for DIY Replacement
This is a beginner-friendly repair; you won’t need any specialty tools. Here’s what each item is actually for:
- New OEM refrigerator door seal, always matched to your exact model number, since gasket length and mounting style vary between brands and even between models from the same brand.
- Screwdriver, needed for the inner lip screws on models where the gasket is held in with a retaining strip rather than just a friction-fit track.
- Warm soapy water and a soft cloth, for cleaning the groove; avoid anything abrasive that could scratch the plastic channel the gasket sits in.
- Hair dryer or heat gun softens the new gasket’s rubber so it seats into corners without cracking, especially in colder rooms.
- Petroleum jelly or gasket lubricant helps the new seal slide into its track smoothly and keeps the rubber supple for longer after installation.

Step-by-Step: How to Replace the Door Seal
1. Unplug and Empty the Refrigerator
Safety first. Unplug your fridge and remove items from the door shelves for better access. If you’re also planning to clean the groove thoroughly, it helps to prop the door fully open or remove it from its hinges on models where that’s easy to do, though for most counter-depth fridges, working with the door attached is perfectly fine.
2. Remove the Old Seal
Gently pull the old gasket from its groove, working slowly around the perimeter rather than yanking from one spot. Carefully loosen any screws under the inner lip; on most models, these are hidden beneath the rubber’s folded edge, so run your finger along the inside of the gasket first to locate them before reaching for the screwdriver.
3. Clean the Gasket Groove
Wipe the groove with warm, soapy water and dry completely before fitting the new seal. This step matters more than it seems: any leftover food residue, mold, or old adhesive in the channel can prevent the new gasket from sitting flush, which defeats the purpose of replacing it in the first place.

4. Install the New Door Seal
Start from one corner and press the gasket into the track. Use a hair dryer to soften if needed, especially at the corners where the rubber has to bend at a sharp angle. Work your way around slowly instead of pulling the whole gasket into place at once; rushing this step is the most common reason DIY installs end up with a bulge or gap.

5. Check Door Alignment
Close the door and inspect for gaps. Adjust the gasket or screws as needed. Run the paper test at several points around the door, not just one corner, since a gasket can seal perfectly on one side while still gapping on another.
6. Test the Seal
Do the paper test again. The paper should stay firmly in place when the door closes. If any section still slides out easily, don’t force the door tighter; recheck that the gasket is fully seated in its track at that spot before assuming the seal itself is defective.

How Often Should You Replace the Seal?
Most counter-depth refrigerator door seals last 5–7 years. Clean monthly and avoid harsh chemicals to extend the life of your gasket.
DIY vs. Professional Replacement: Cost Comparison
One of the main reasons this is worth doing yourself is the gap between the parts cost and what a service call typically adds on top.
| Approach | Typical Cost | Time Involved |
| DIY replacement | $30–$80 (parts only) | 30–45 minutes |
| Professional technician | $150–$300+ (parts + labor + service call) | Same-day to several days, depending on scheduling |
The main trade-off is warranty coverage and diagnostic confidence: a technician can confirm whether the door itself is warped or the hinges are worn before assuming the seal is the only culprit. If your fridge is still under manufacturer warranty, check whether a seal replacement is covered before paying out of pocket.
Common Mistakes to Avoid When Replacing a Door Seal
- Buying a universal seal instead of an OEM part, it may look close enough in the listing photo but fail to grip the magnet strip properly once installed.
- Skipping the cleaning step and installing the new gasket over old residue or mold in the track.
- Forcing the gasket into place cold: Rubber that hasn’t been warmed slightly is far more likely to crack at the corners during installation.
- Only testing the paper test at one spot on the door instead of checking multiple points around the full perimeter.
- Overtightening the retaining screws, which can pucker the rubber and create small gaps instead of a flush seal.
Does Climate or Season Affect Your Door Seal?
Yes, temperature swings are one of the more overlooked reasons a seal fails earlier than expected. In hot, humid climates, rubber gaskets can soften and become more prone to stretching or sagging out of shape. In cold climates, especially near an exterior wall or unheated garage, the rubber can stiffen and lose flexibility, making it more likely to crack when the door is opened and closed repeatedly. If your fridge sits in a kitchen with big day-to-night temperature swings, it’s worth checking the seal every few months rather than waiting for the annual check-up.
Energy Efficiency Tip for 2026
According to Consumer Reports, replacing worn-out seals can reduce energy use by up to 10% per year.
Preventive Maintenance Routine
A few minutes of upkeep every month can add years to your gasket’s lifespan and delay your next replacement significantly.
- Wipe seals weekly to remove debris, crumbs, and sticky spills that can work their way into the folds of the rubber.
- Apply petroleum jelly every few months to keep the rubber flexible and prevent it from drying out and cracking.
- Avoid overloading door shelves, since excess weight pulls the door out of true and stresses one section of the seal more than the rest.
- Check door alignment regularly by running the paper test around the full perimeter every couple of months, not just when you suspect a problem.
- Use mild soap instead of bleach or ammonia-based cleaners, which strip the natural oils that keep rubber gaskets pliable.
| Pro Tip: If you’re a renter or student, this DIY task is an easy weekend fix that saves money. Families can do it to improve kitchen efficiency. |
Door Seal Replacement FAQs
Q1: Can I replace a door seal without removing the whole door?
Ans: Yes. Most counter-depth models allow the gasket to be pulled from its track without detaching the door itself; you’re working with the seal channel, not the hinges.
Q2: Do I need an OEM seal, or will a universal one work?
Ans: OEM seals fit the exact groove and magnet strip for your model. Universal seals are cheaper but may not seal as tightly, which can undo the energy savings you’re trying to gain.
Q3: How long does a DIY door seal replacement take?
Ans: Most people finish in 30–45 minutes once the new gasket has been ordered and is on hand.
Q4: Will a new seal fix a door that doesn’t close level?
Ans: Not on its own. If the door is misaligned due to hinge wear, a new seal helps, but you may also need to adjust the hinge screws for a full fix.
Q5: Can I use super glue or tape instead of replacing the whole seal?
Ans: Only as a short-term patch. Adhesives don’t restore the magnetic seal strip inside the gasket, so cold air will still leak over time.
Q6: What’s the average cost of a replacement seal?
Ans: OEM gaskets typically range from $30–$80 depending on the model, which is far cheaper than the added energy cost of running a leaking fridge for a year.
Q7: Does a bad door seal affect the freezer too?
Ans: Yes, if it’s a French door or side-by-side model sharing a cooling system, a warm-air leak on one side can force the whole unit, including the freezer, to work harder.
Conclusion
A worn-out counter-depth refrigerator door seal can silently increase your energy bills and reduce cooling efficiency. Replace it yourself to maintain freshness and reduce power use.
Seal replaced but still noticing warm spots or frost buildup? The gasket might not be your only issue.
Related Articles
👉 Fixing Moldy Refrigerator Door Gasket, Safe DIY Cleaning Tips
👉 Refrigerator Maintenance Tips to Extend Its Lifespan
👉 Why is My Counter-Depth Fridge Humming? 5 Silence Hacks (2026)
👉 The 70% Rule: Why Your Counter-Depth Fridge is Failing (Fix It Now!)